
Battery box 2x18650
Expected uptime: 2 weeks
Introduction
Components
Tools and materials
Assembly
Testing
Cost
Advanced variants
Introduction
It is intended to be a small "workhorse", with a weather-resistant enclosure and a compact size and weight that allow for easy transport.
The expected lifespan is 2 weeks, which is more than enough time to test a new location or to temporarily rebuild a damaged section of the mesh (like emergency situations when a stationary repeater fails, disconnecting part of the network, or when you want to set up a temporary network at the site)
Due to limited space and the purpose of the box, there is no on/off switch. You turn on the box by connecting the JST connector to the board. Adding a switch is possible, but remember that every hole reduces the enclosure’s waterproofing.
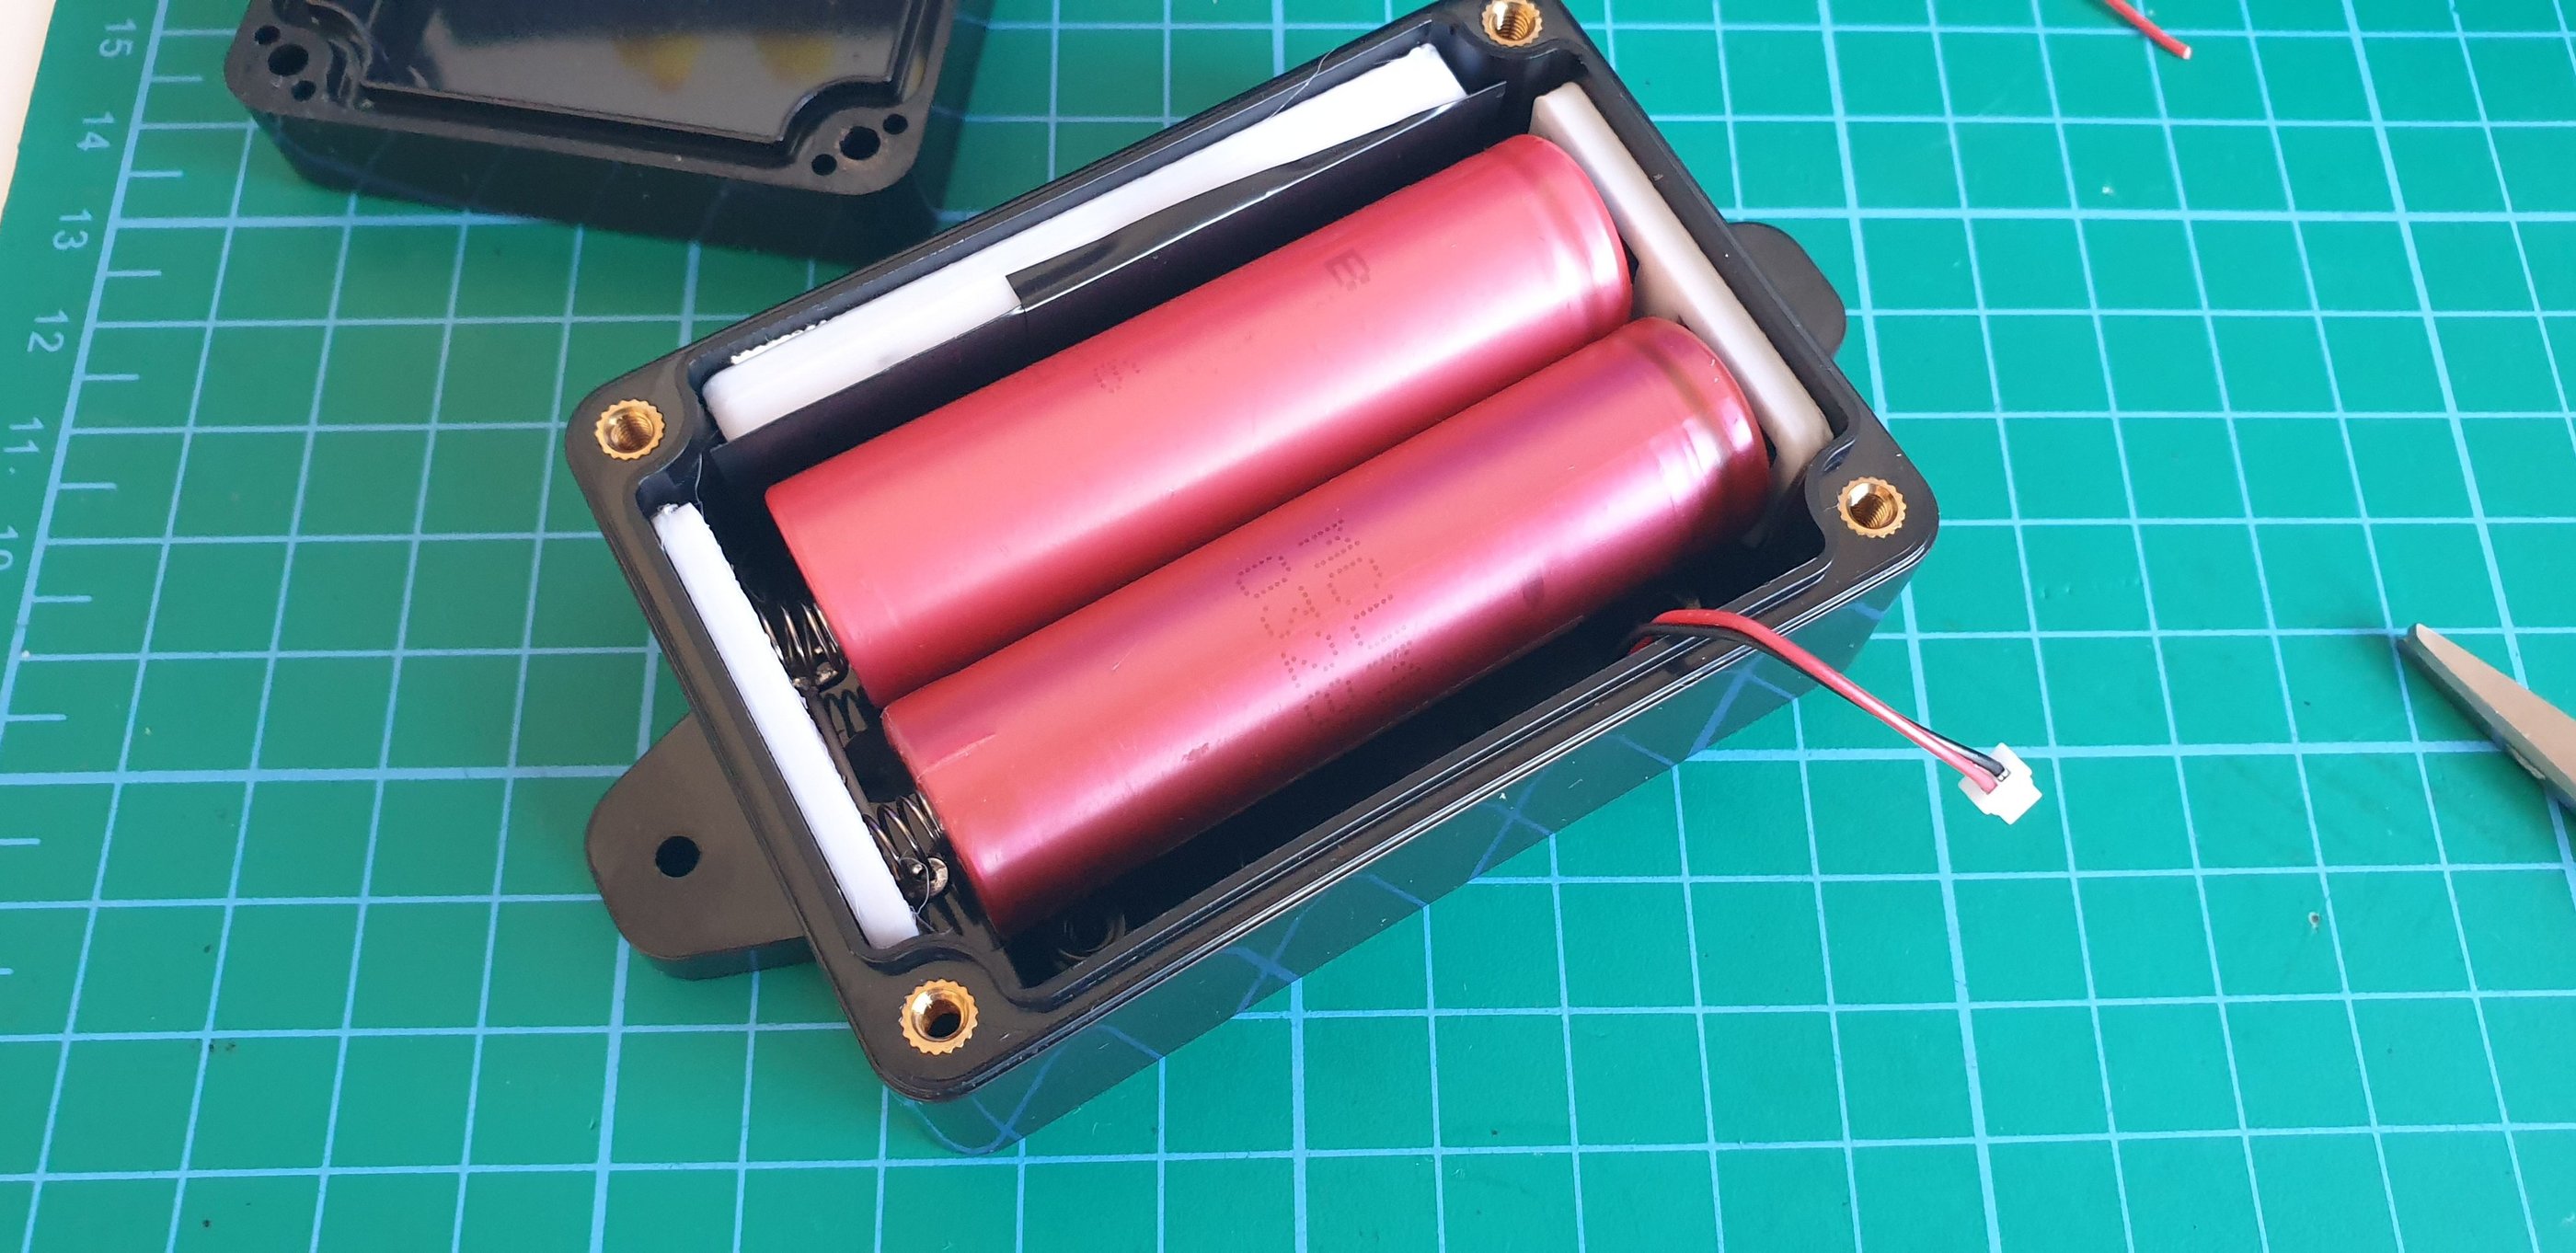
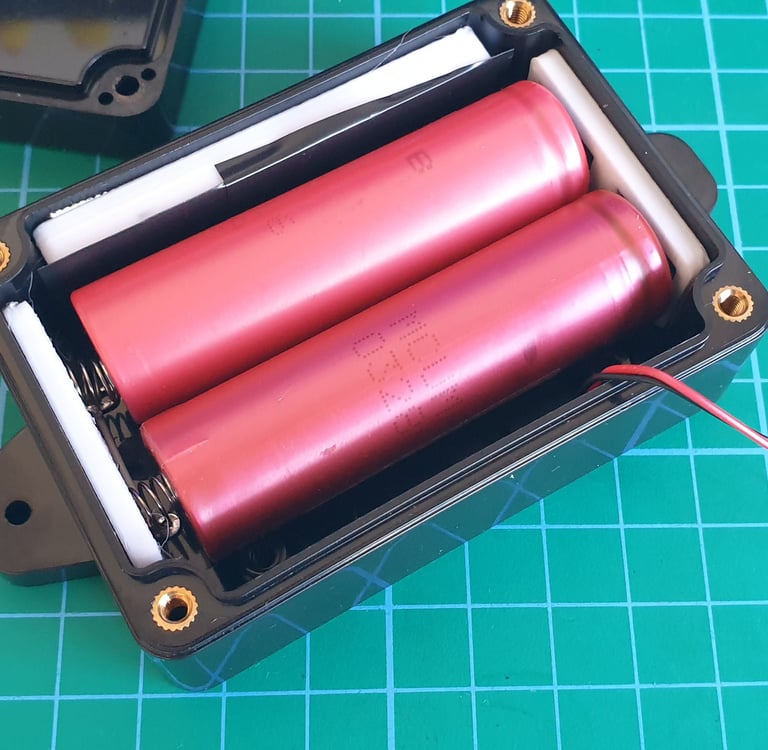
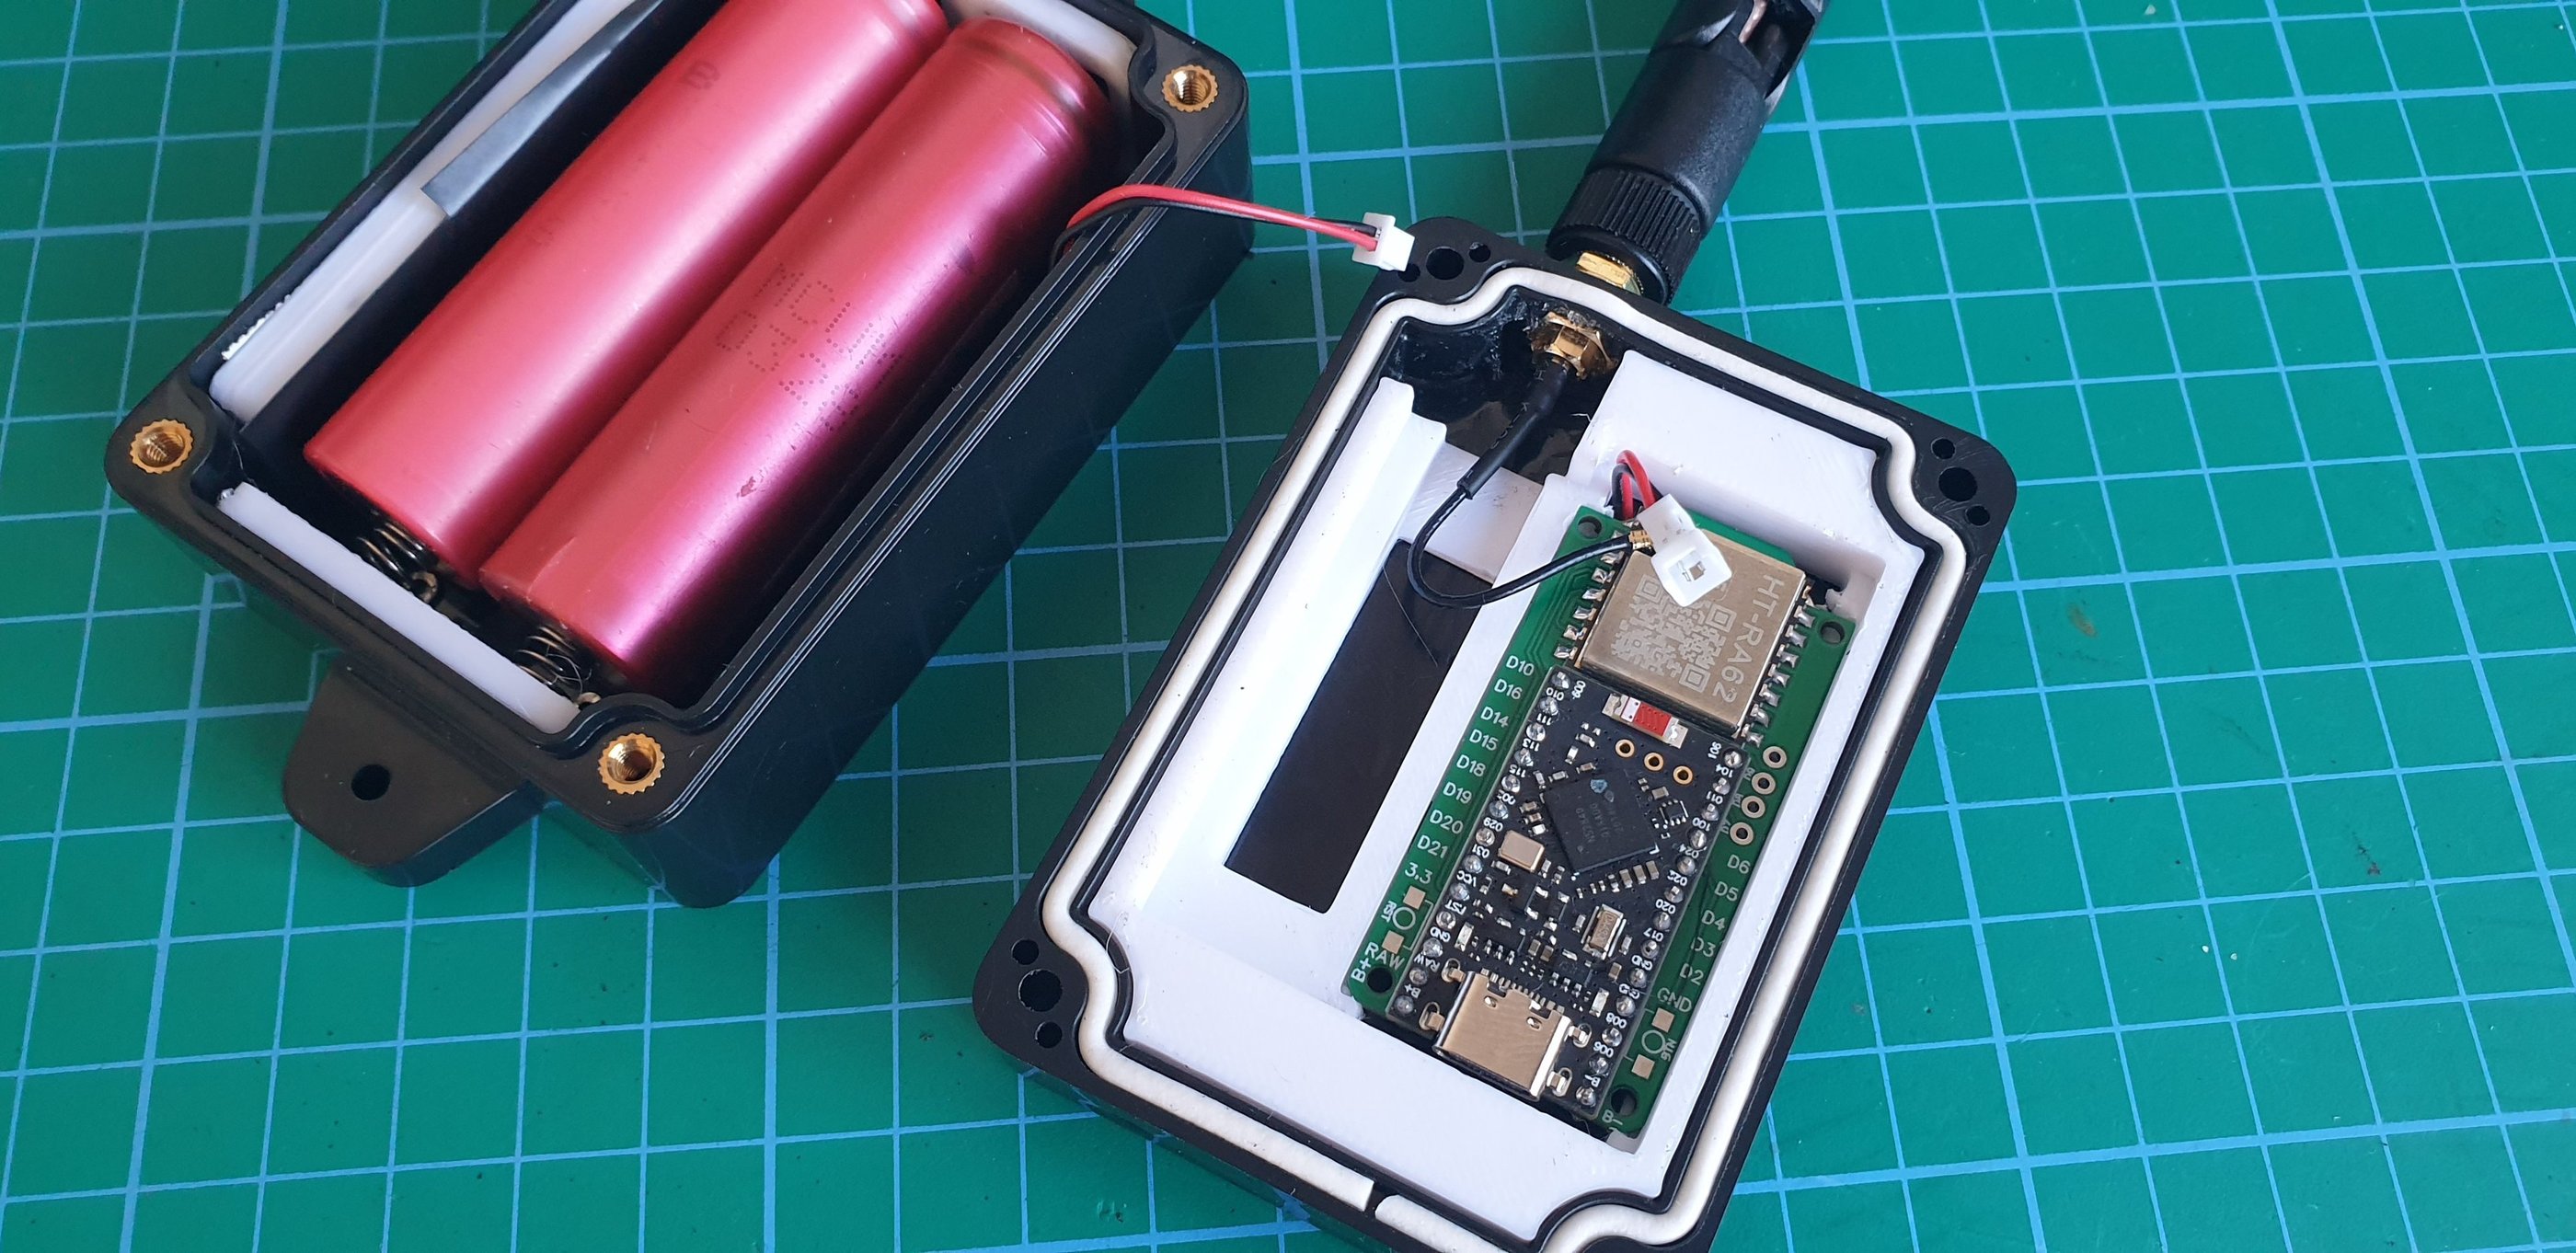
The build will use two 18650 batteries connected in parallel to increase capacity. The output voltage of the power section should not exceed 4.2 V. The BMS is also designed to operate up to a maximum of 4.2 V.
During assembly and testing, always double-check the polarity!
Incorrect connections can permanently damage components and burn out the board.
Don`t rush, take your time and check everything twice.
Components
Required parts
Faktec V4 board
SMA /ipx pigtail 5cm long
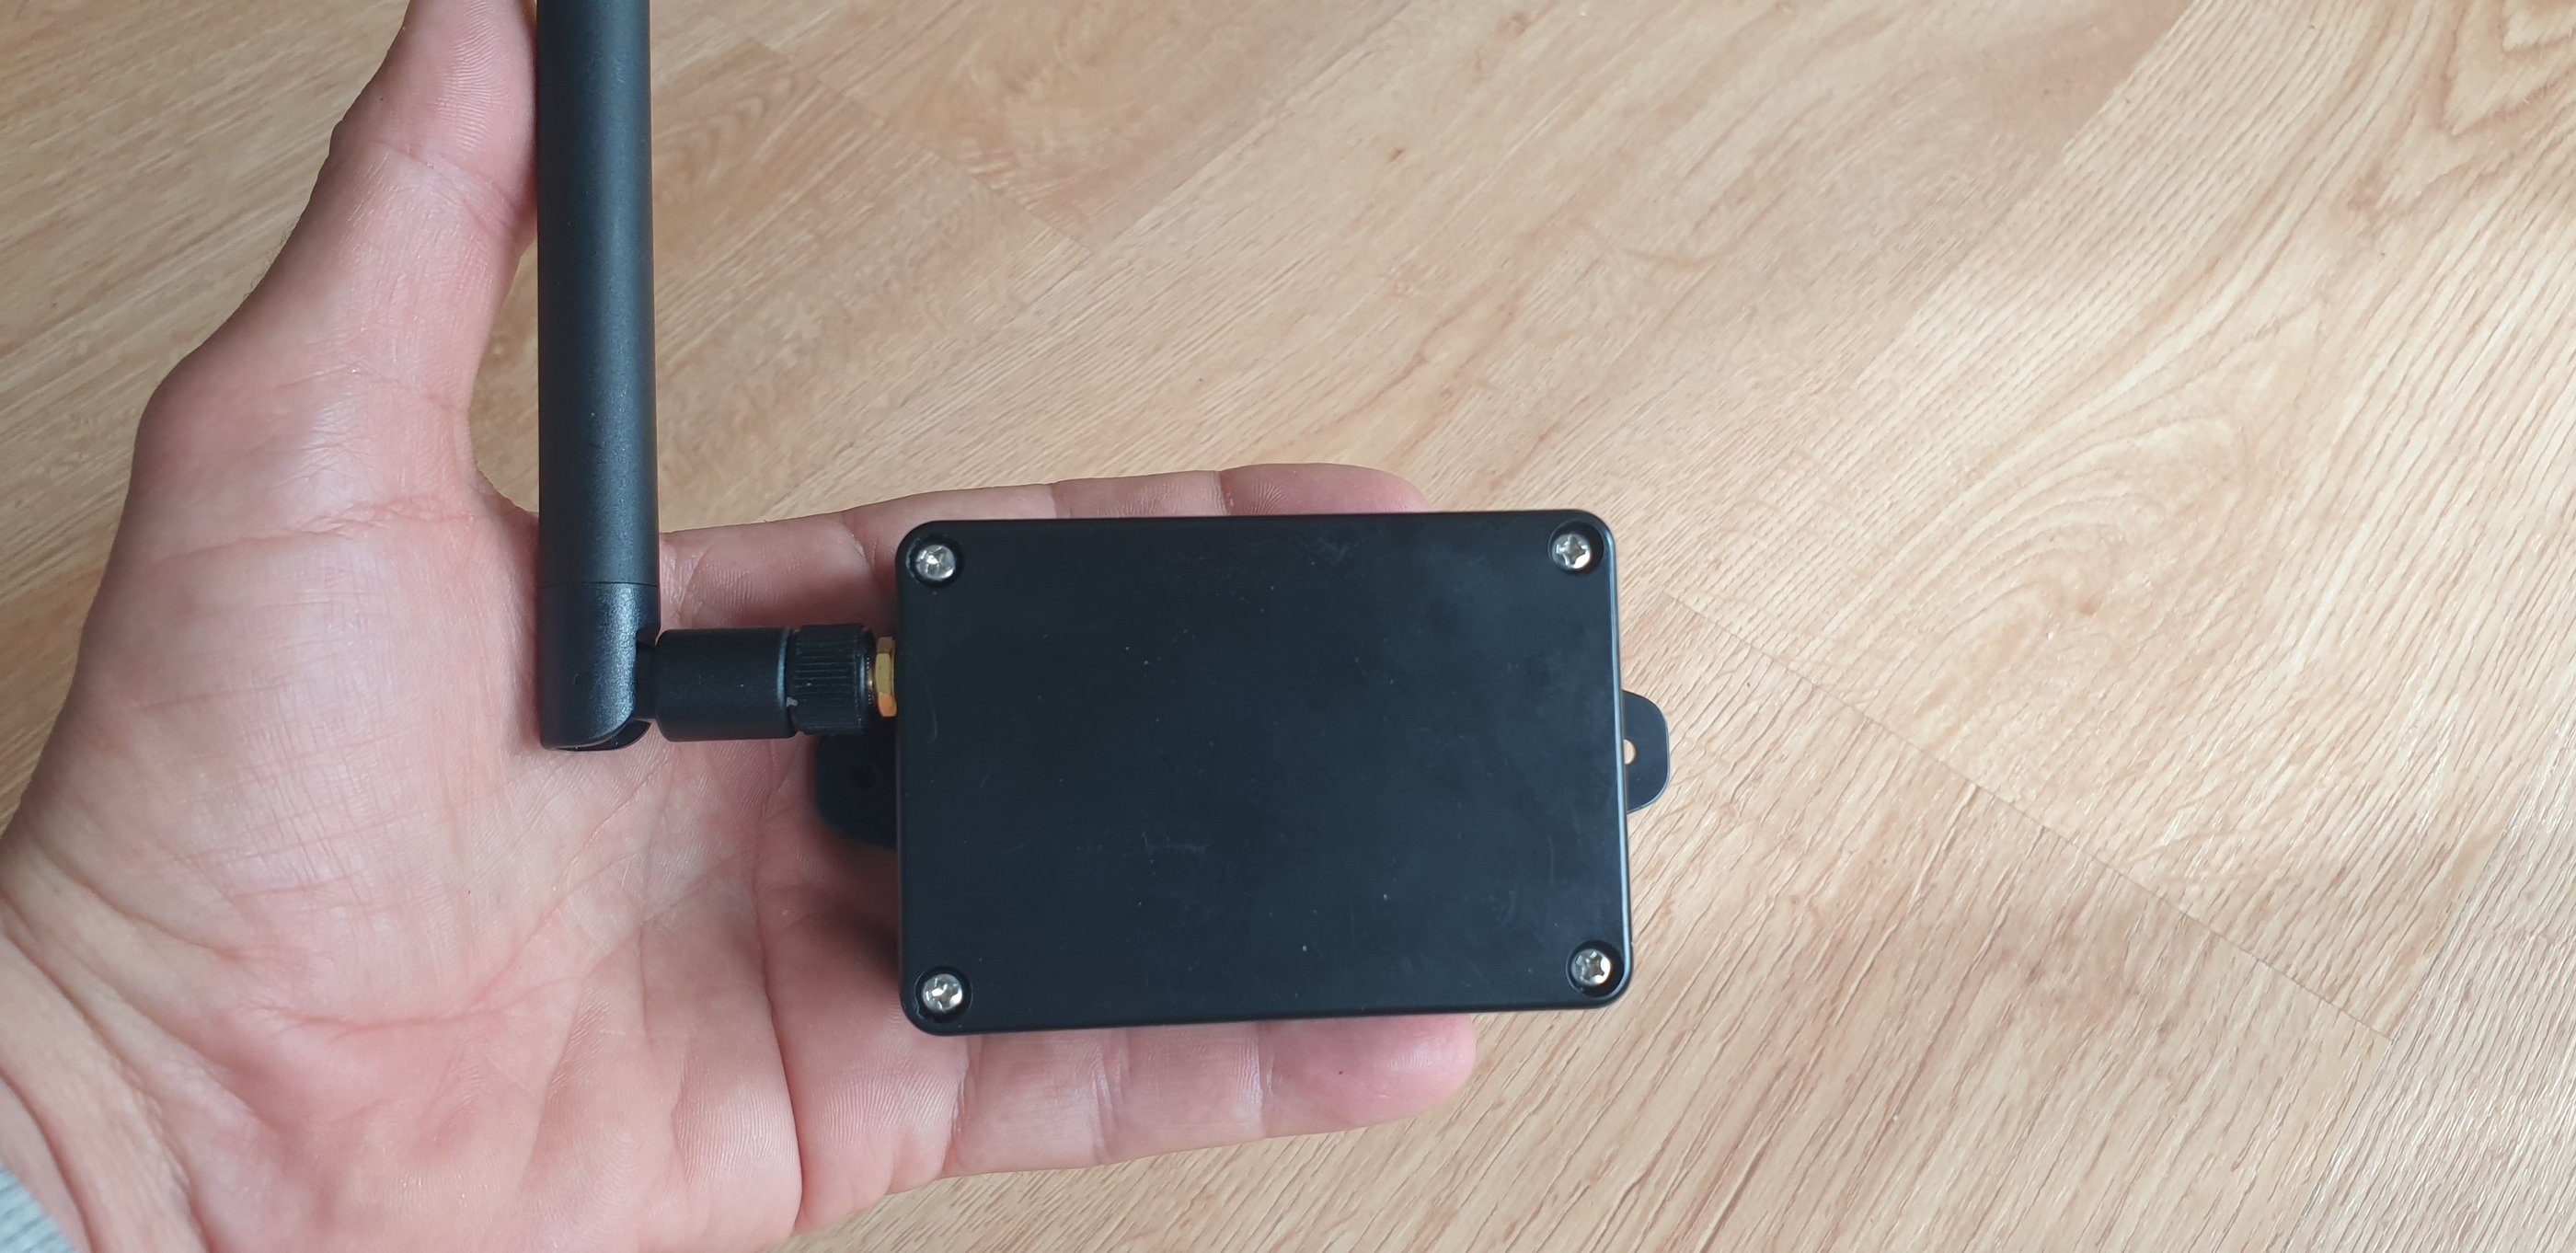
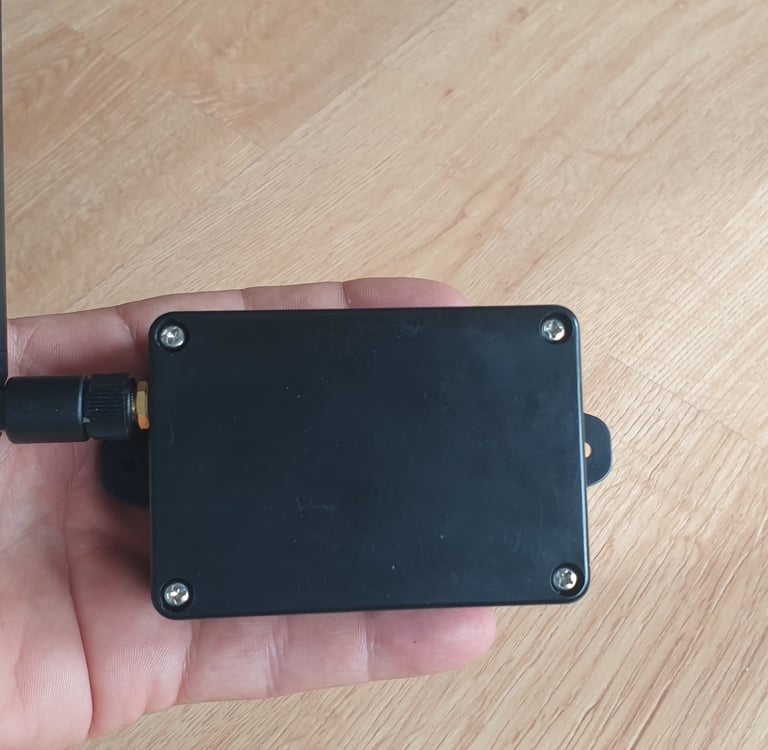
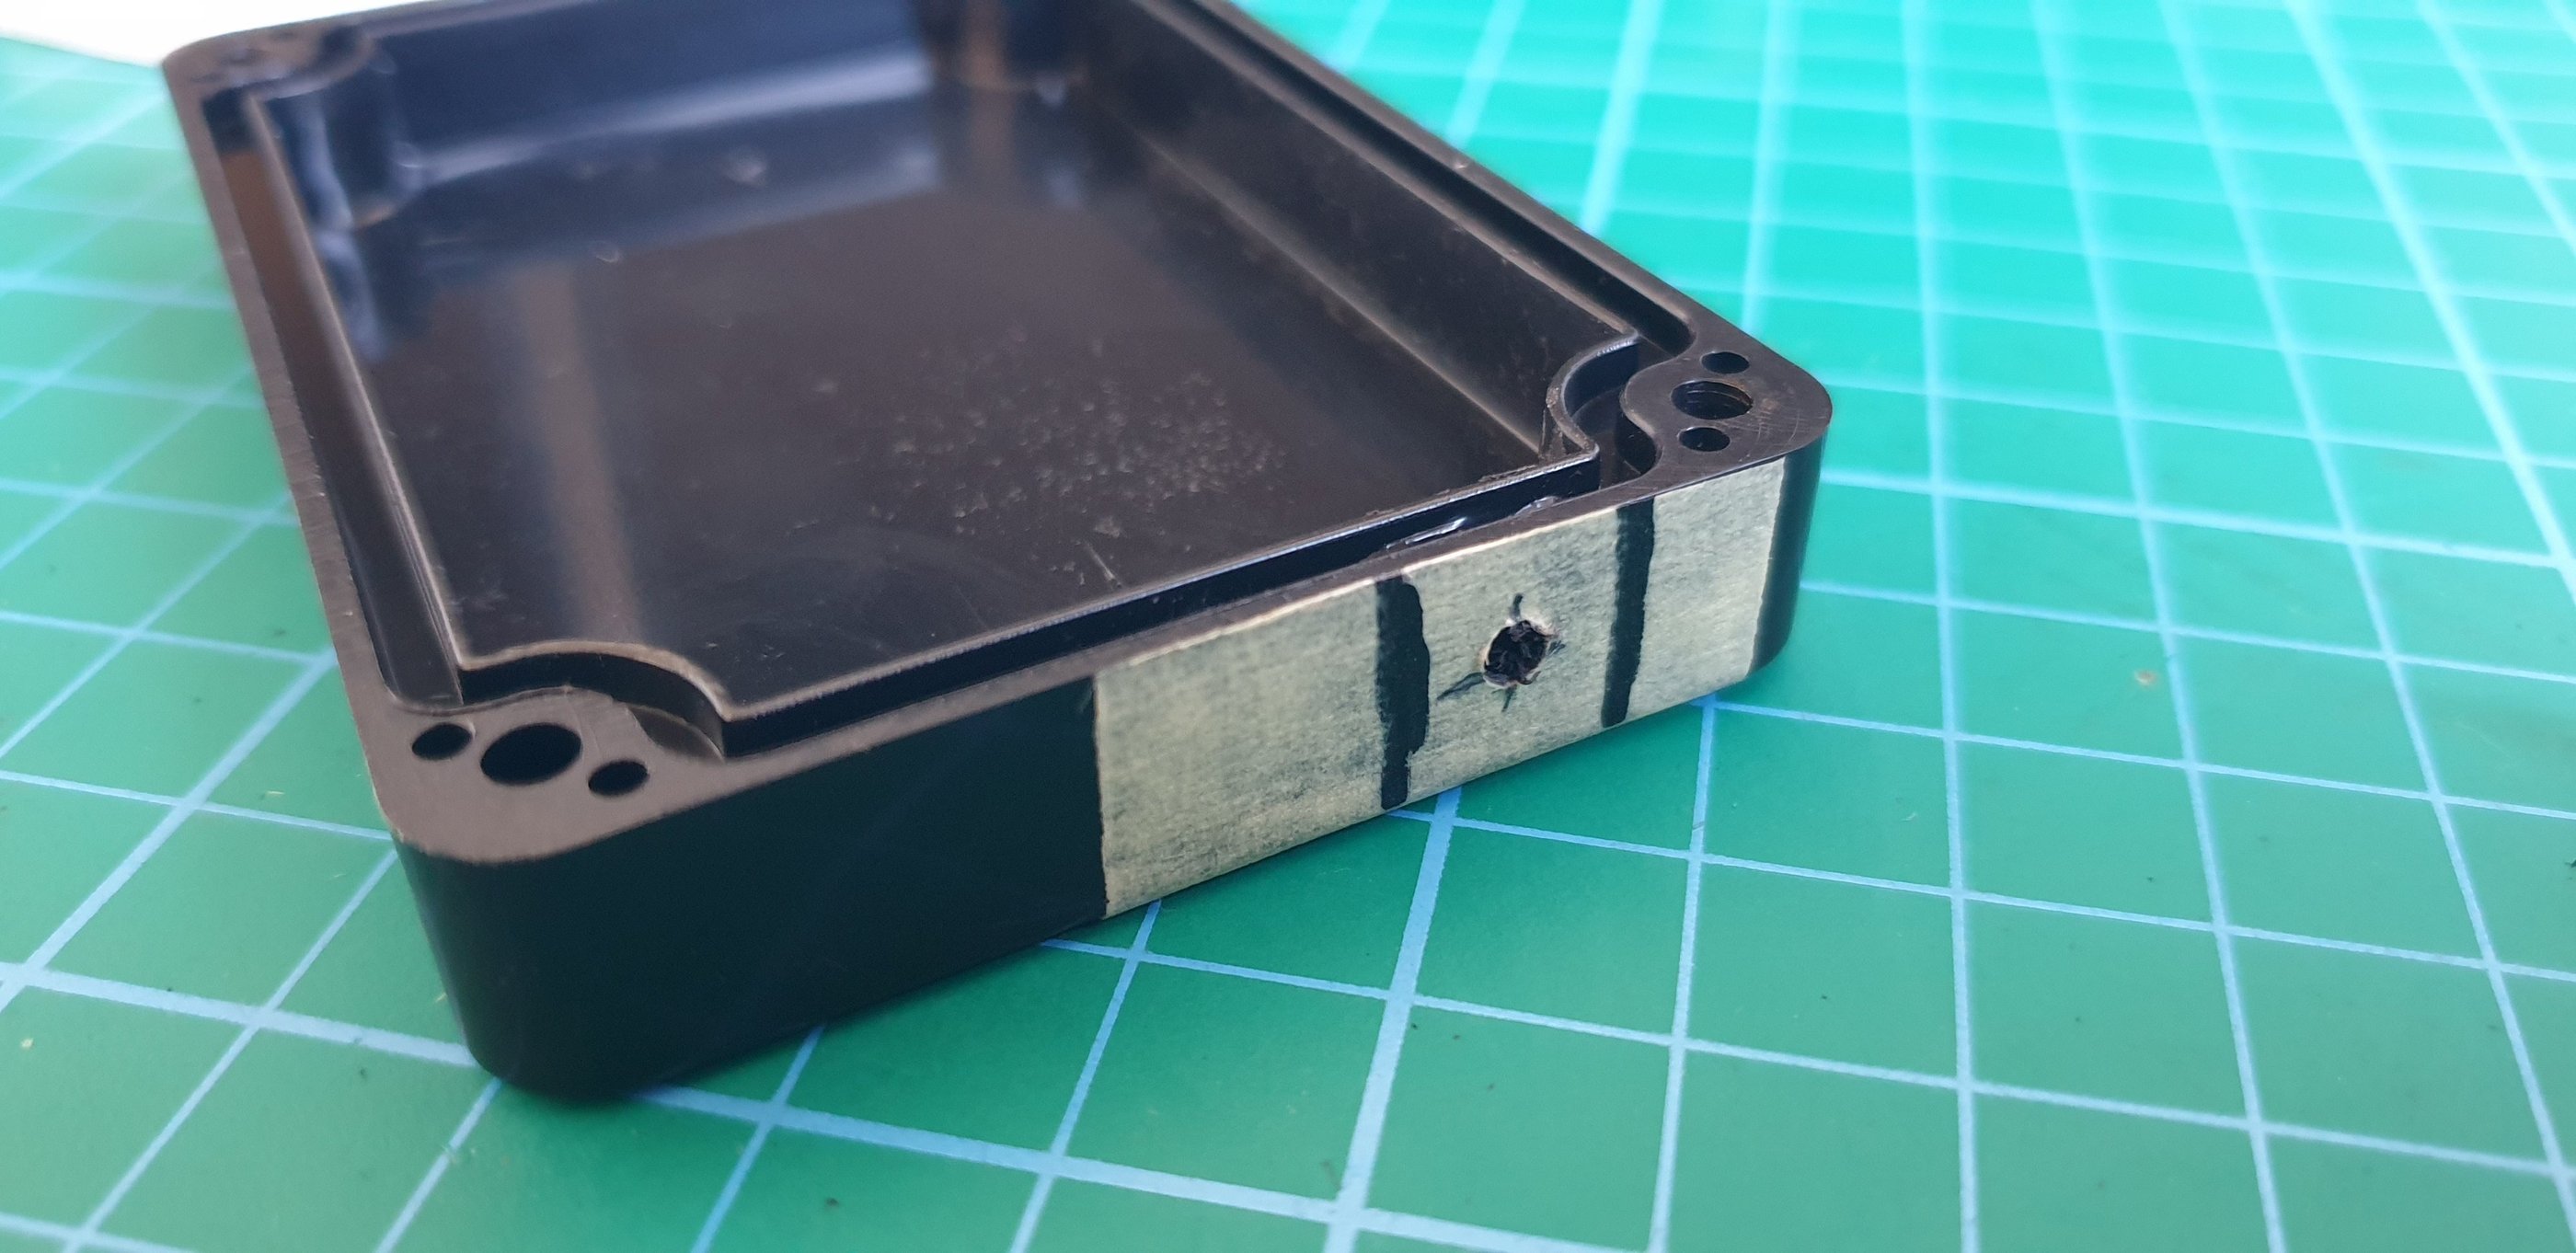
IP67 ABS case 58x83x35 ( grey/black), there are version with or without "ears" I have used one with the ears for this build
2x battery contacts
JST pigtails
Double-sided tape for securing components inside.
Optional parts
3d parts (link to 3d files in downlad section)
BMS If you are planning to use it for more than a few days. It’s useful to have protection to prevent the battery from over-discharge. Typical BMS protection cuts off around 2.7 V. Without it, the batteries will be fully drained and permanently damaged.
Tools and materials
Soldering Iron + solder
Wire cutting pliers.
Good lighting.
A set of small files.
A hand drill and a set of small drill bits.
Assembly
Materials for the build
The fully assembled box will fit in your hand, with a total weight of around 200 g.
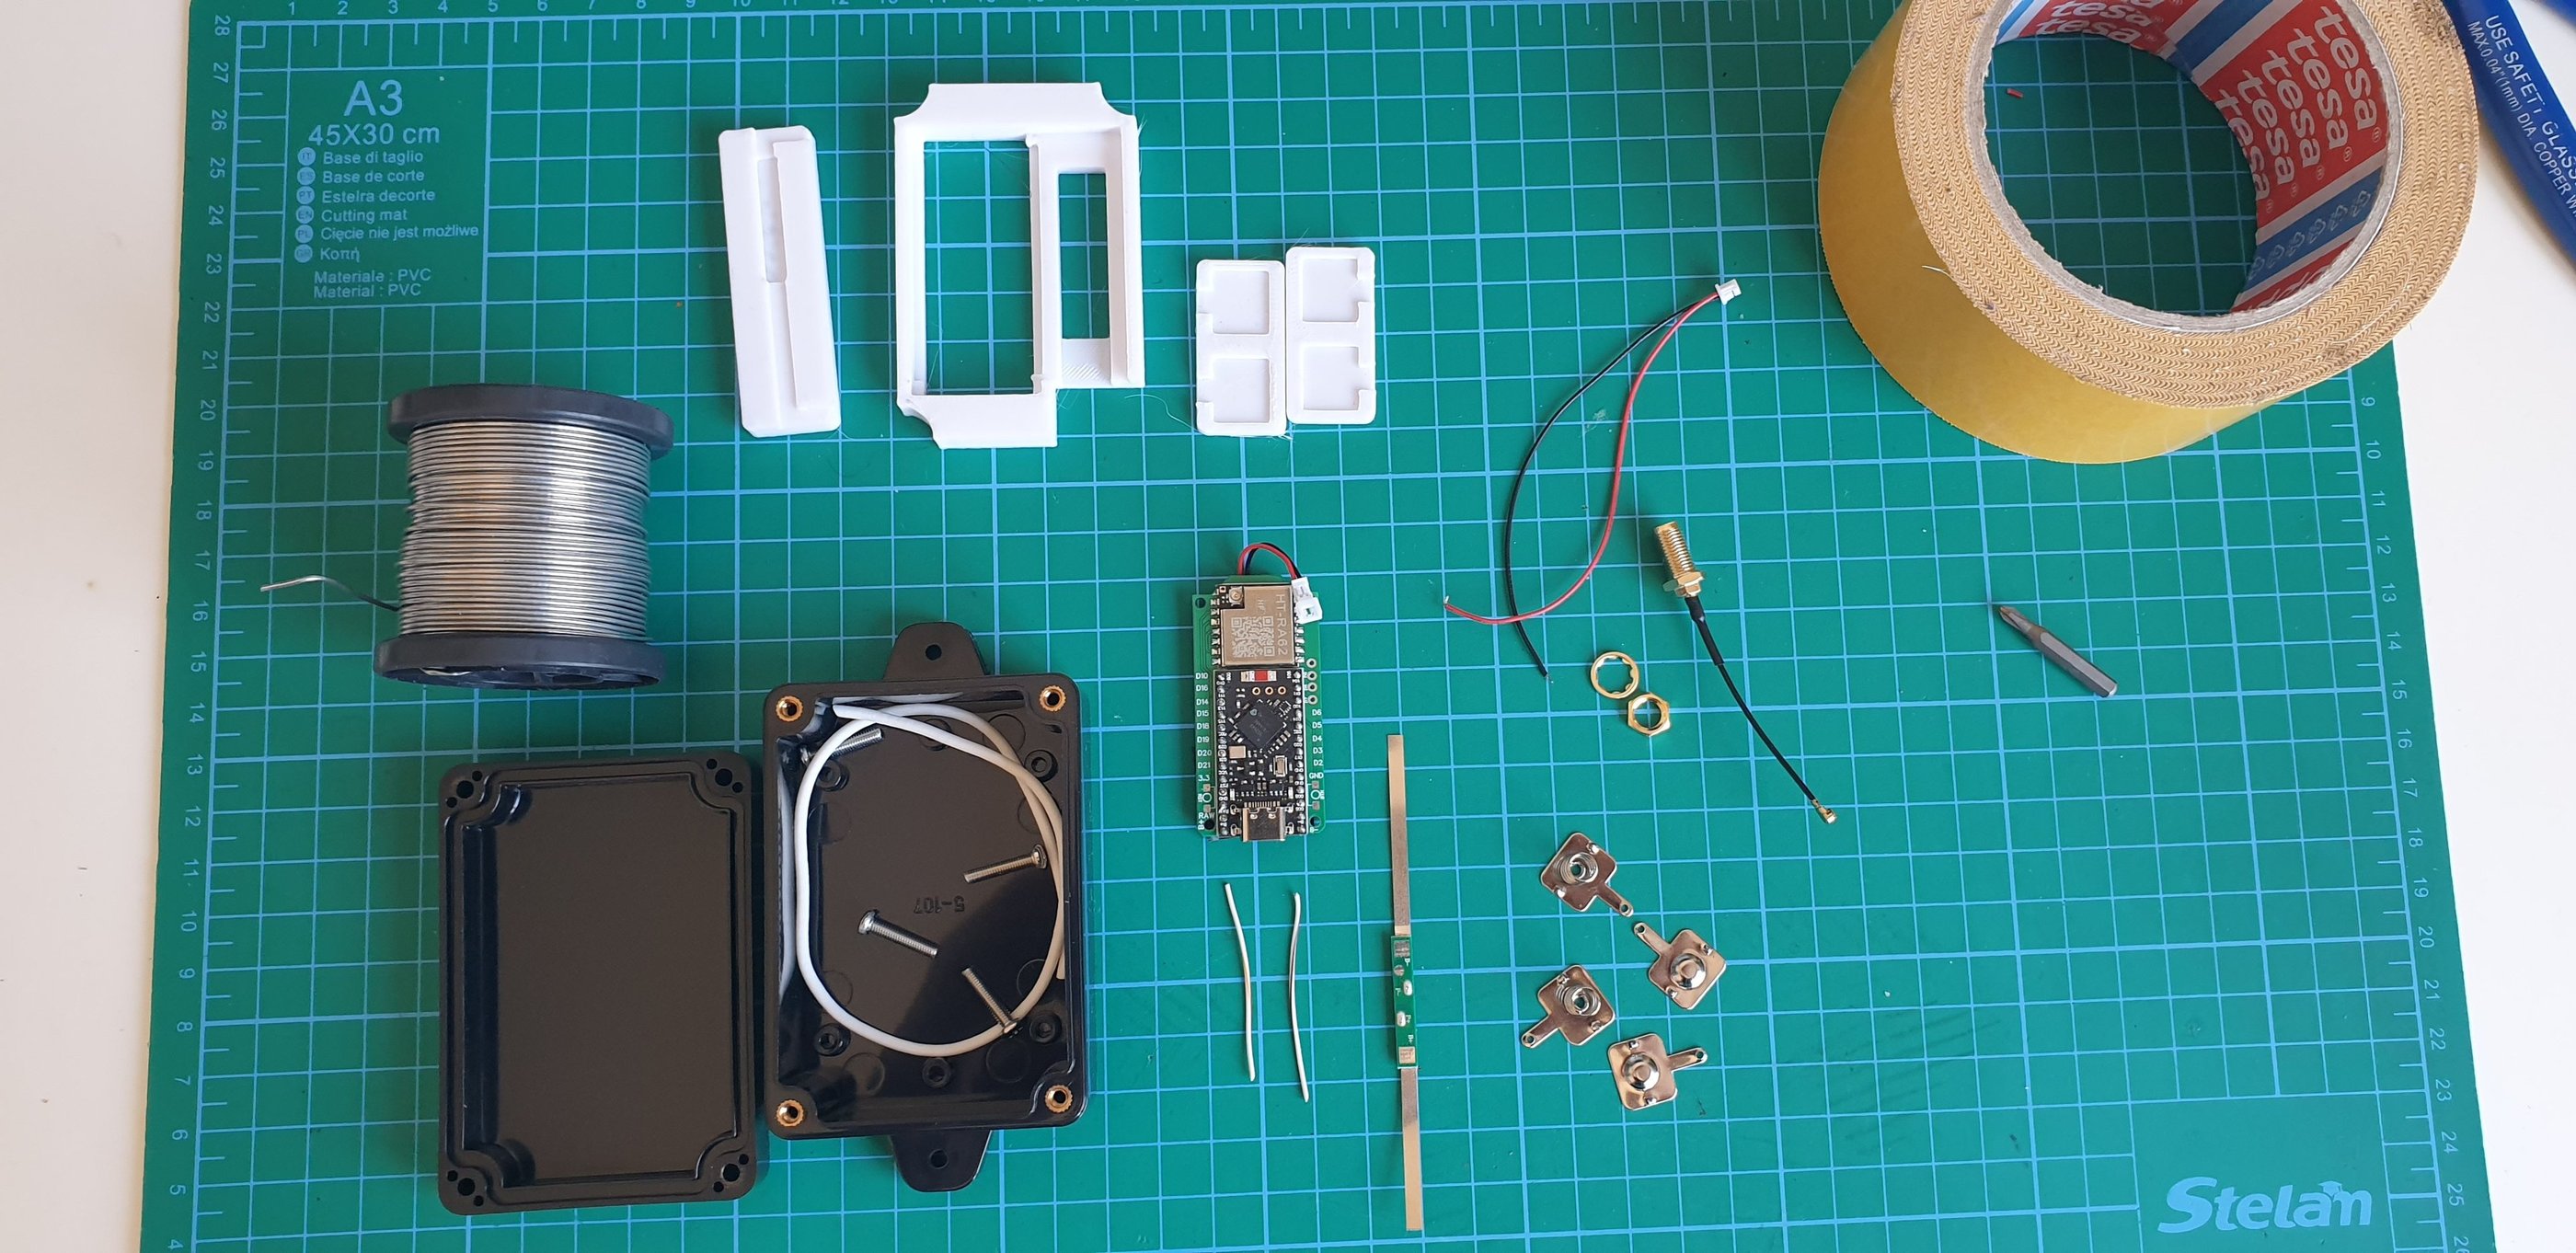
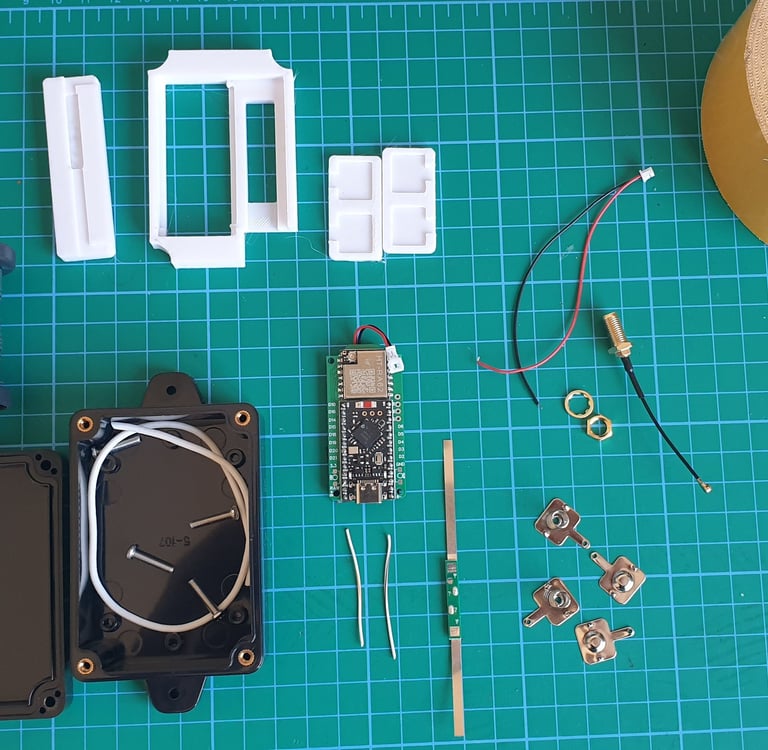
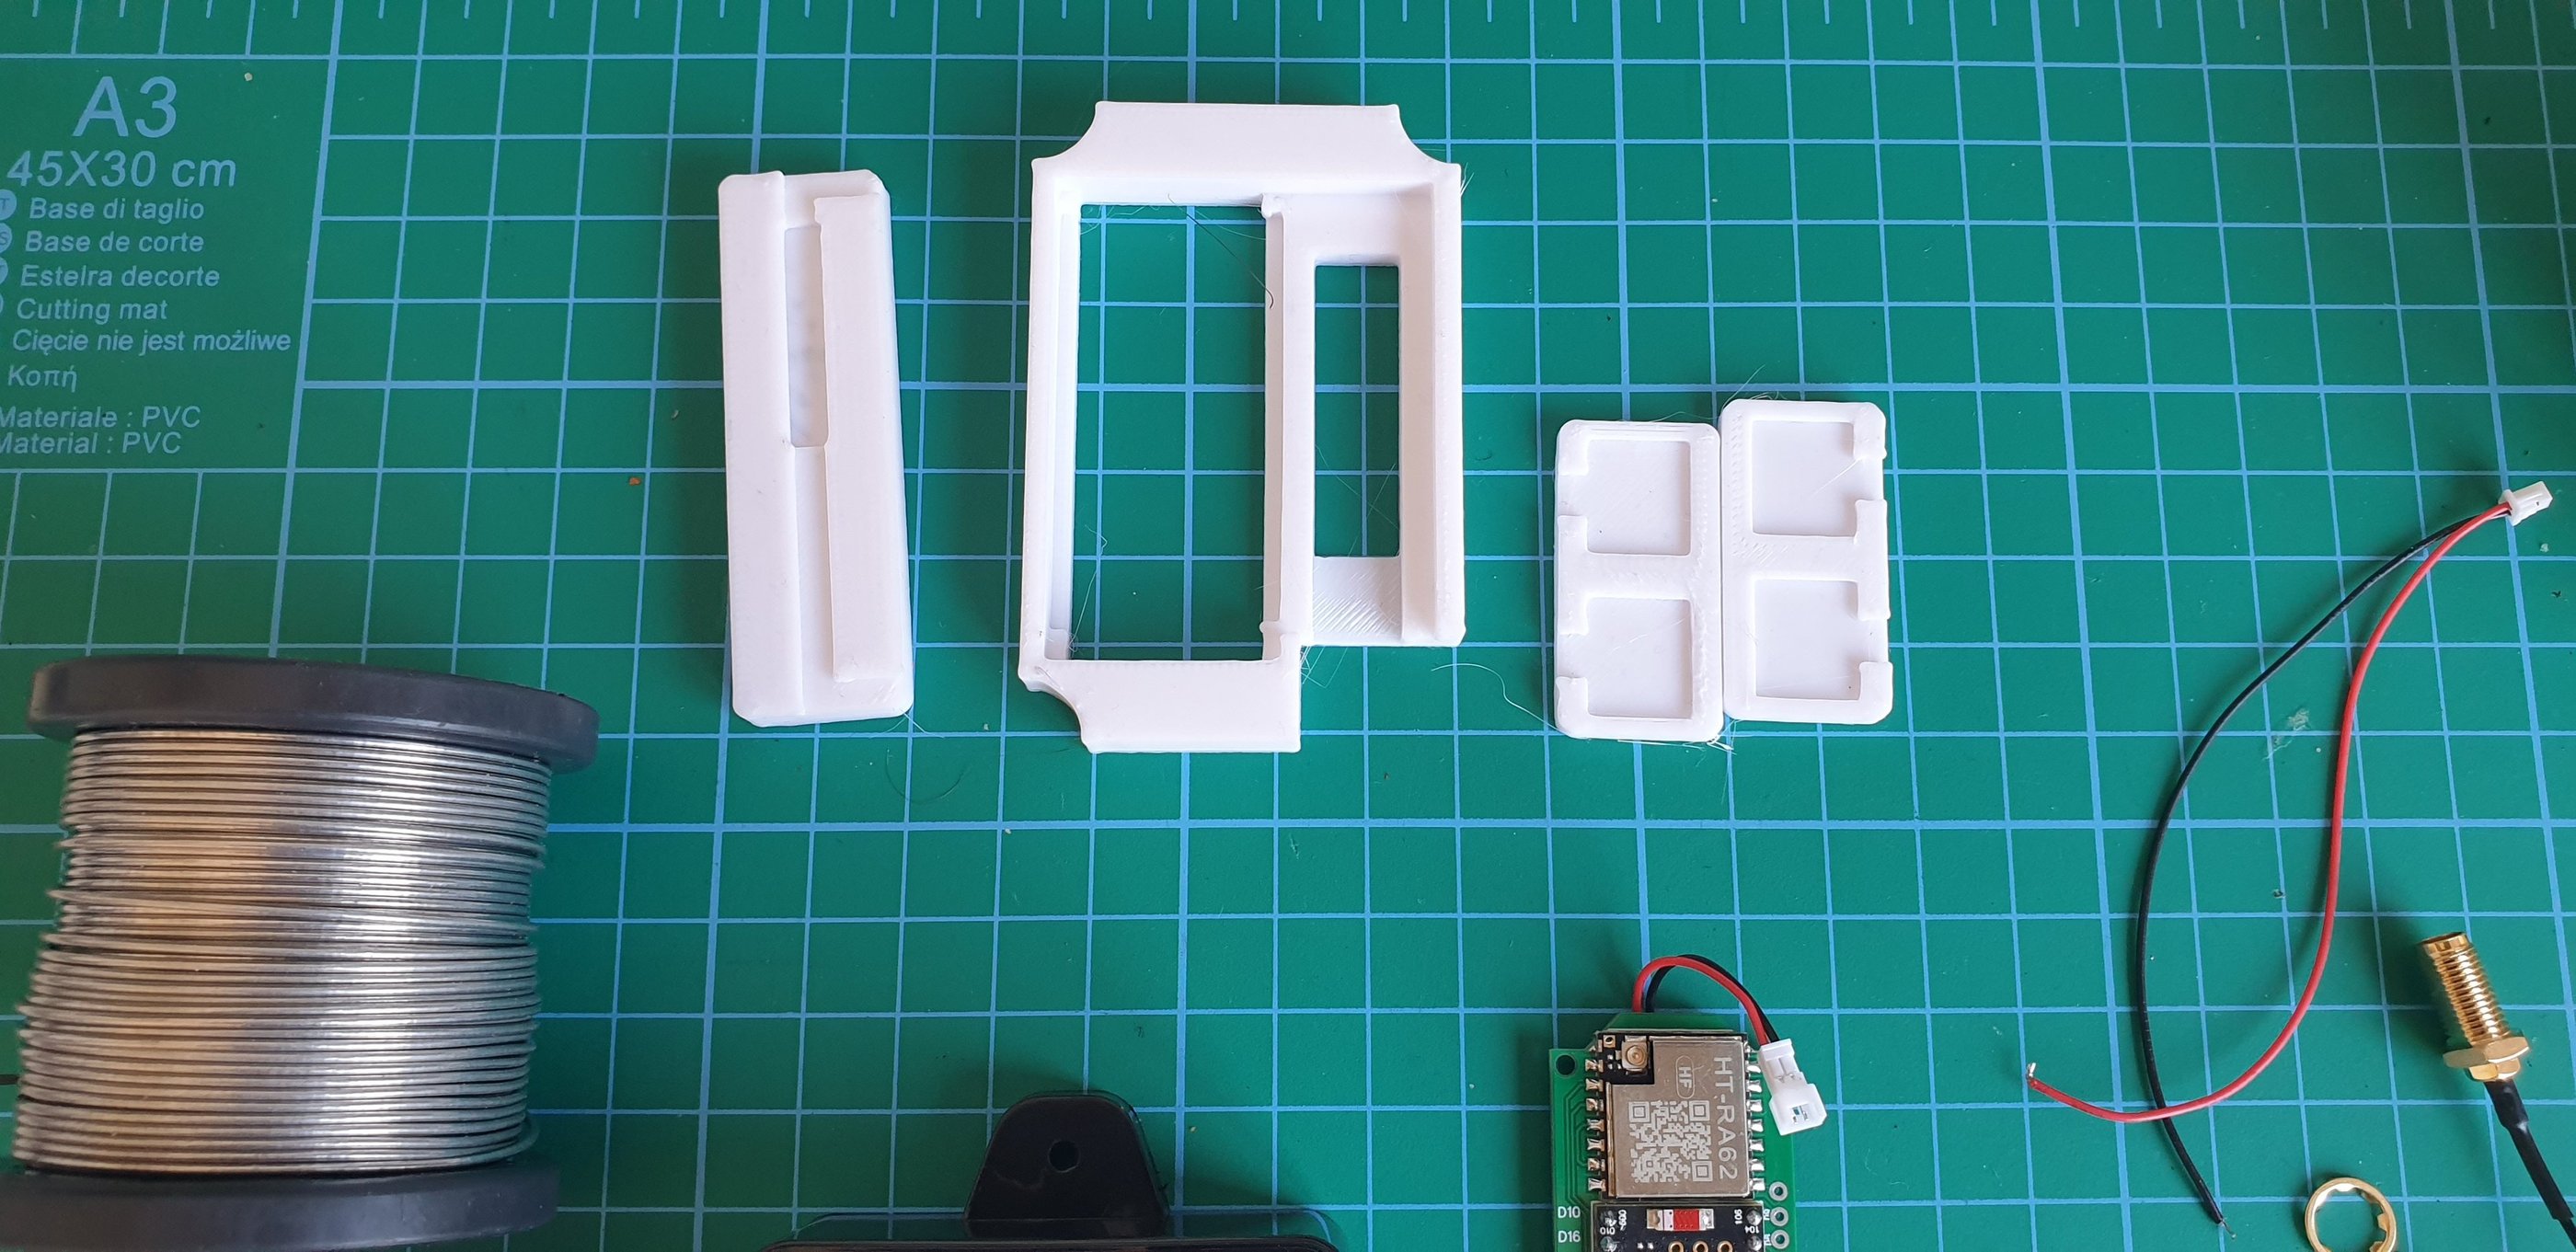

It’s nice to have 3D parts, they will help in organizing and holding components inside, but they are not essential. 3D files in the download section.

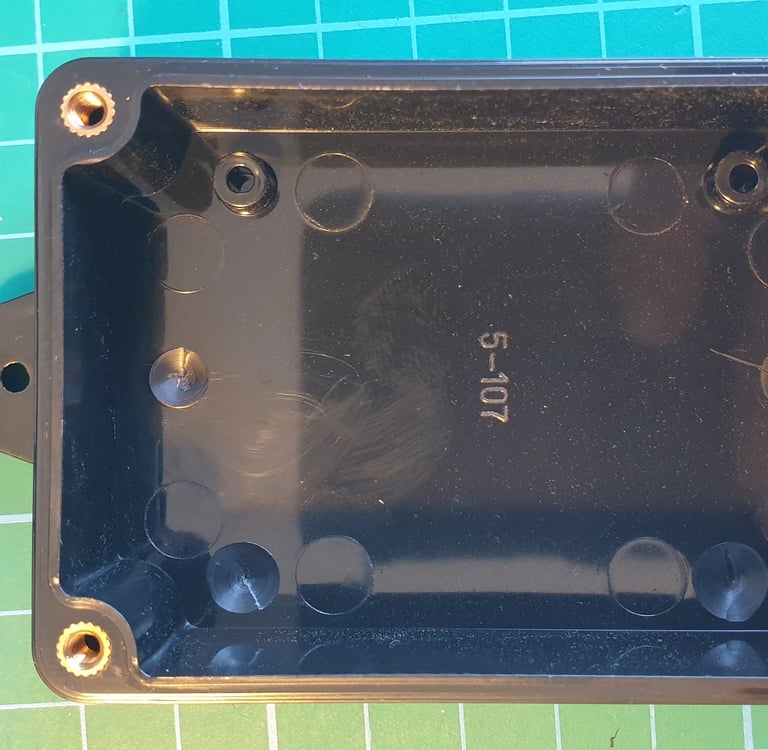
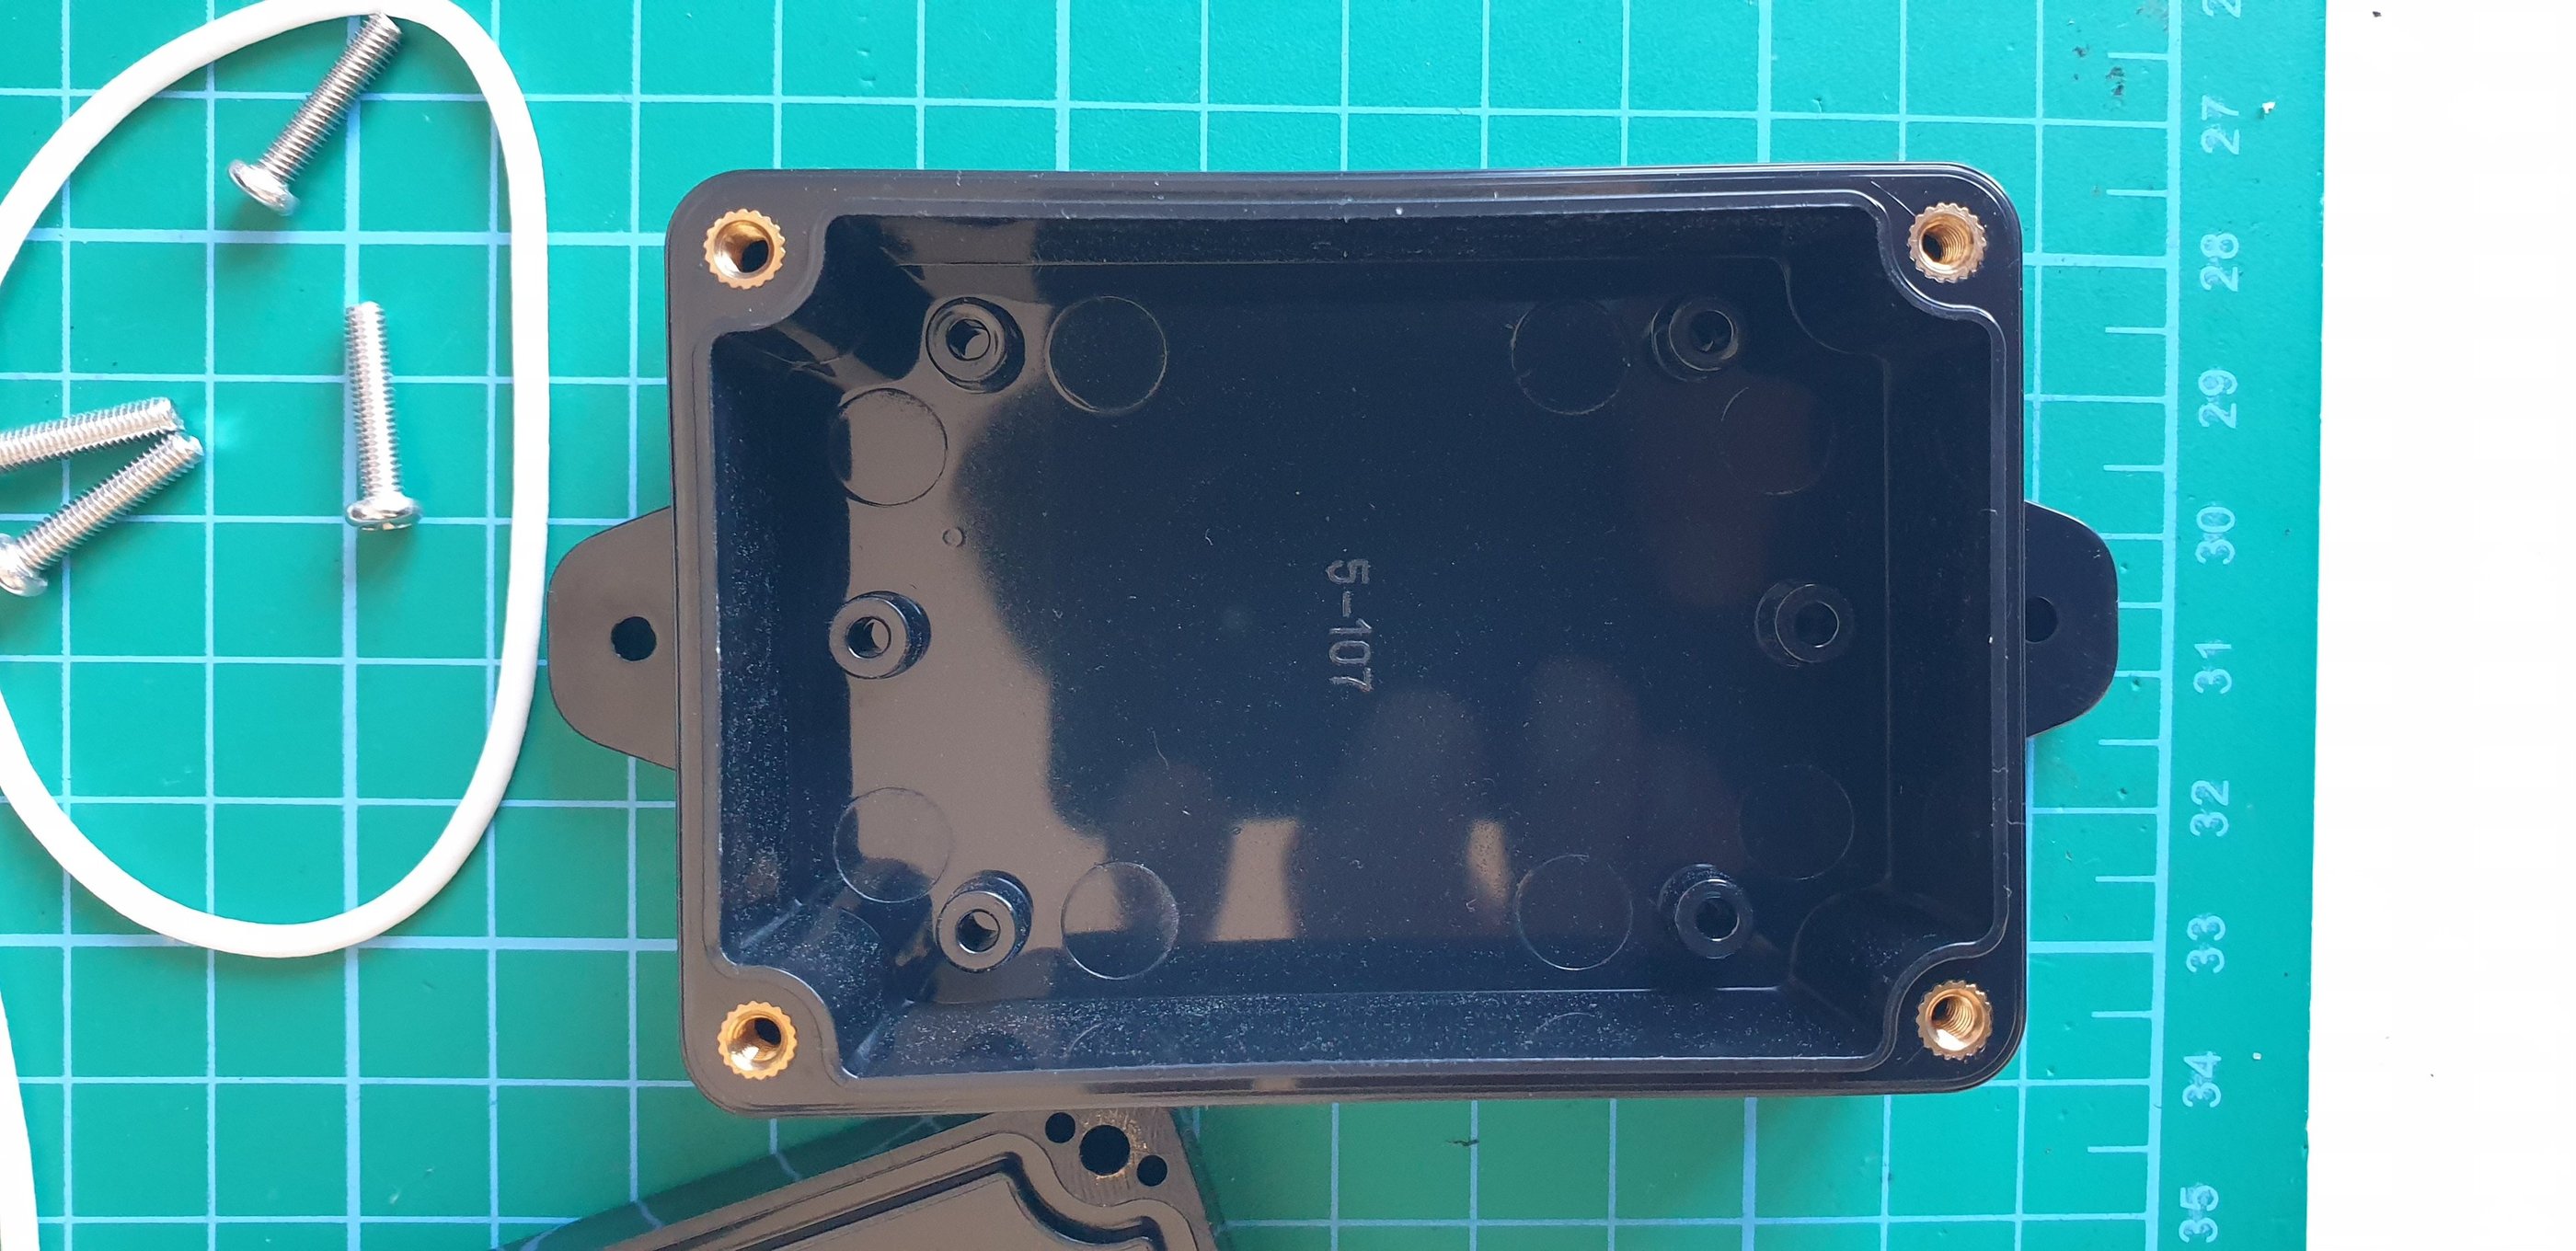
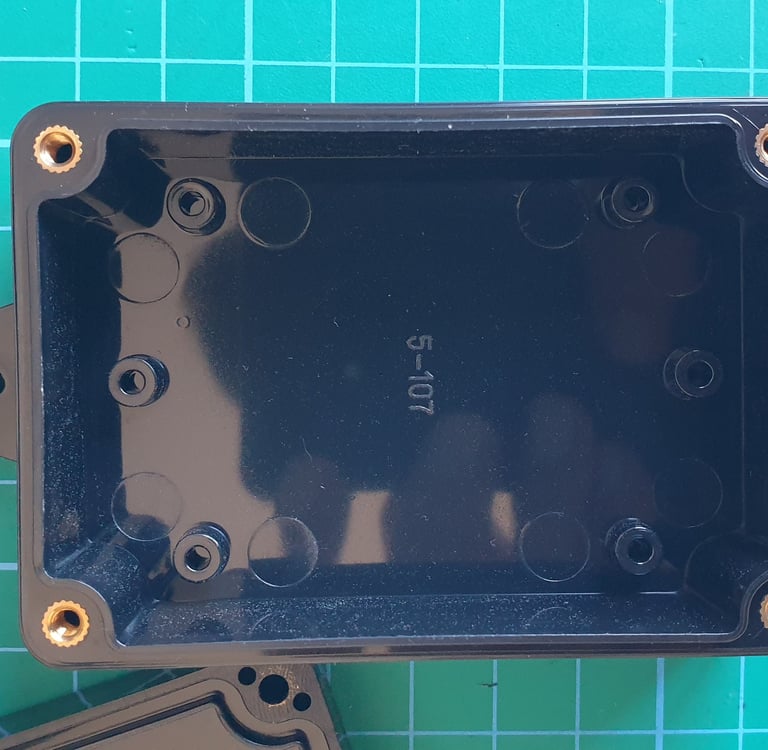
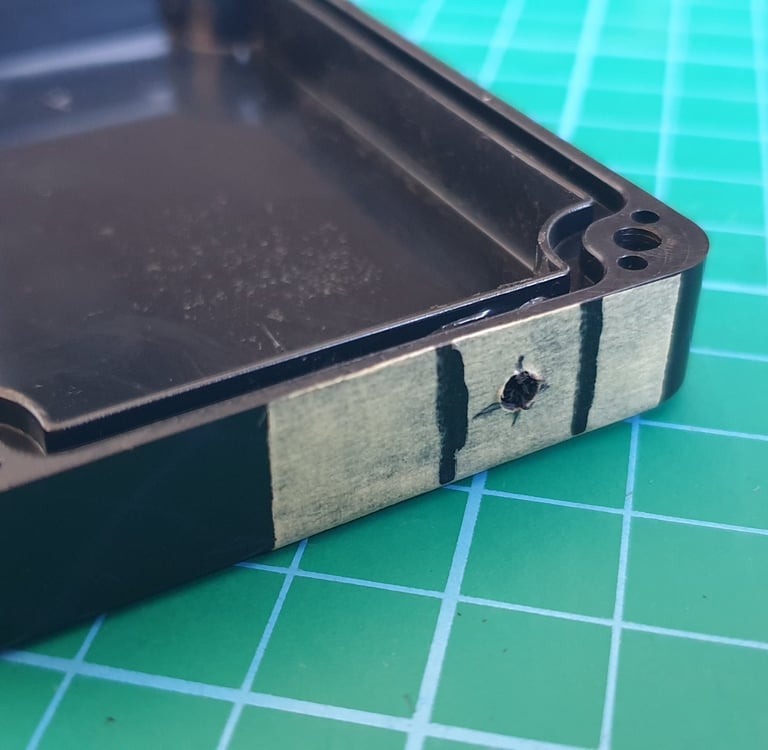
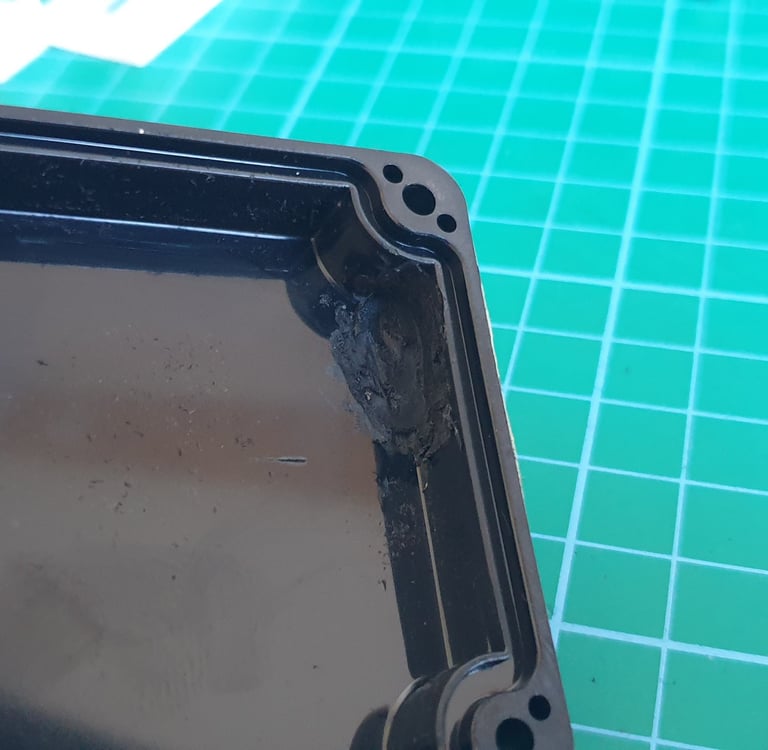
First, the box needs to be prepared for installation. There are a few pieces inside that need to be removed. The photos show the bottom of the enclosure before and after.
The easiest way to remove them is with a 6–10 mm drill bit. It doesn’t have to be perfect, just make sure not to drill all the way through.
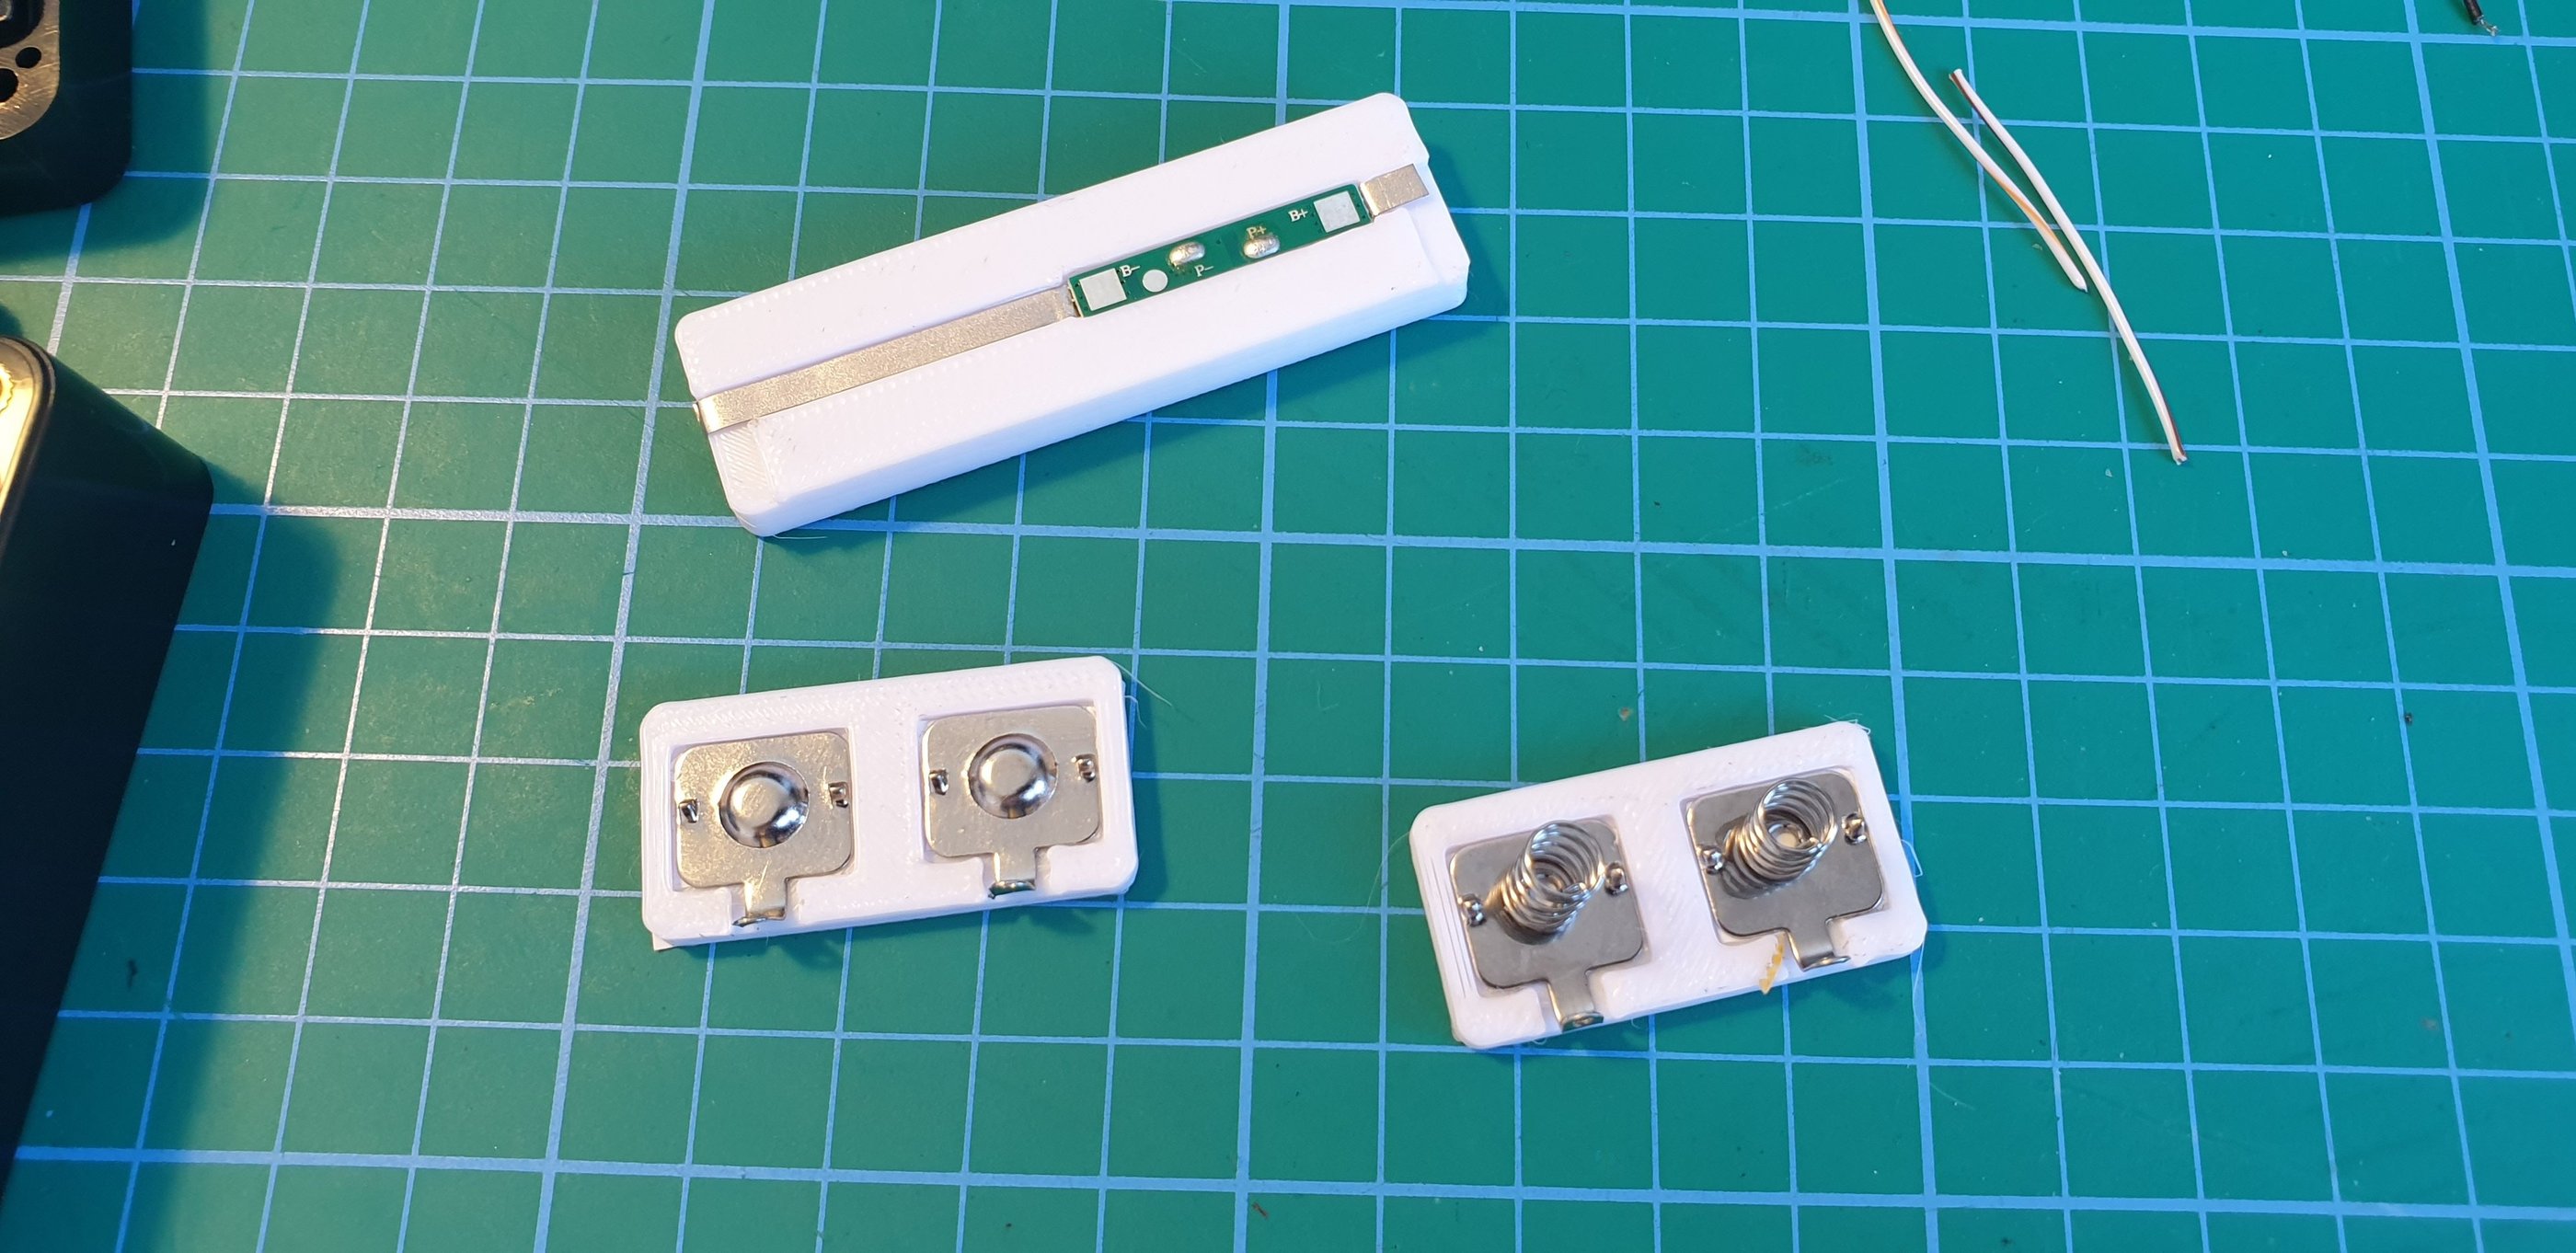
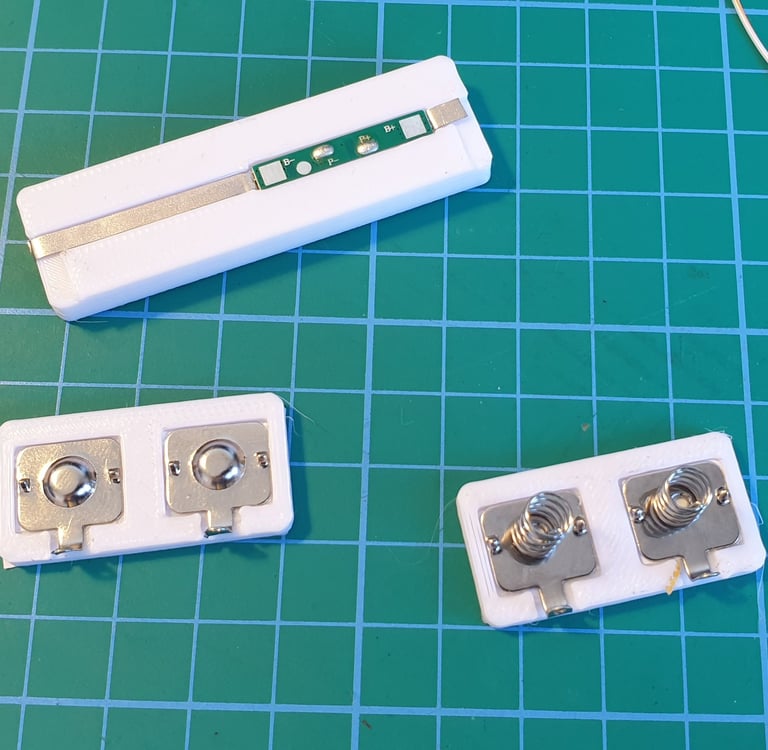
Now we’ll move to assembling the box’s power section. Using double-sided tape, mount the battery plates and the BMS into the prepared 3D inserts.
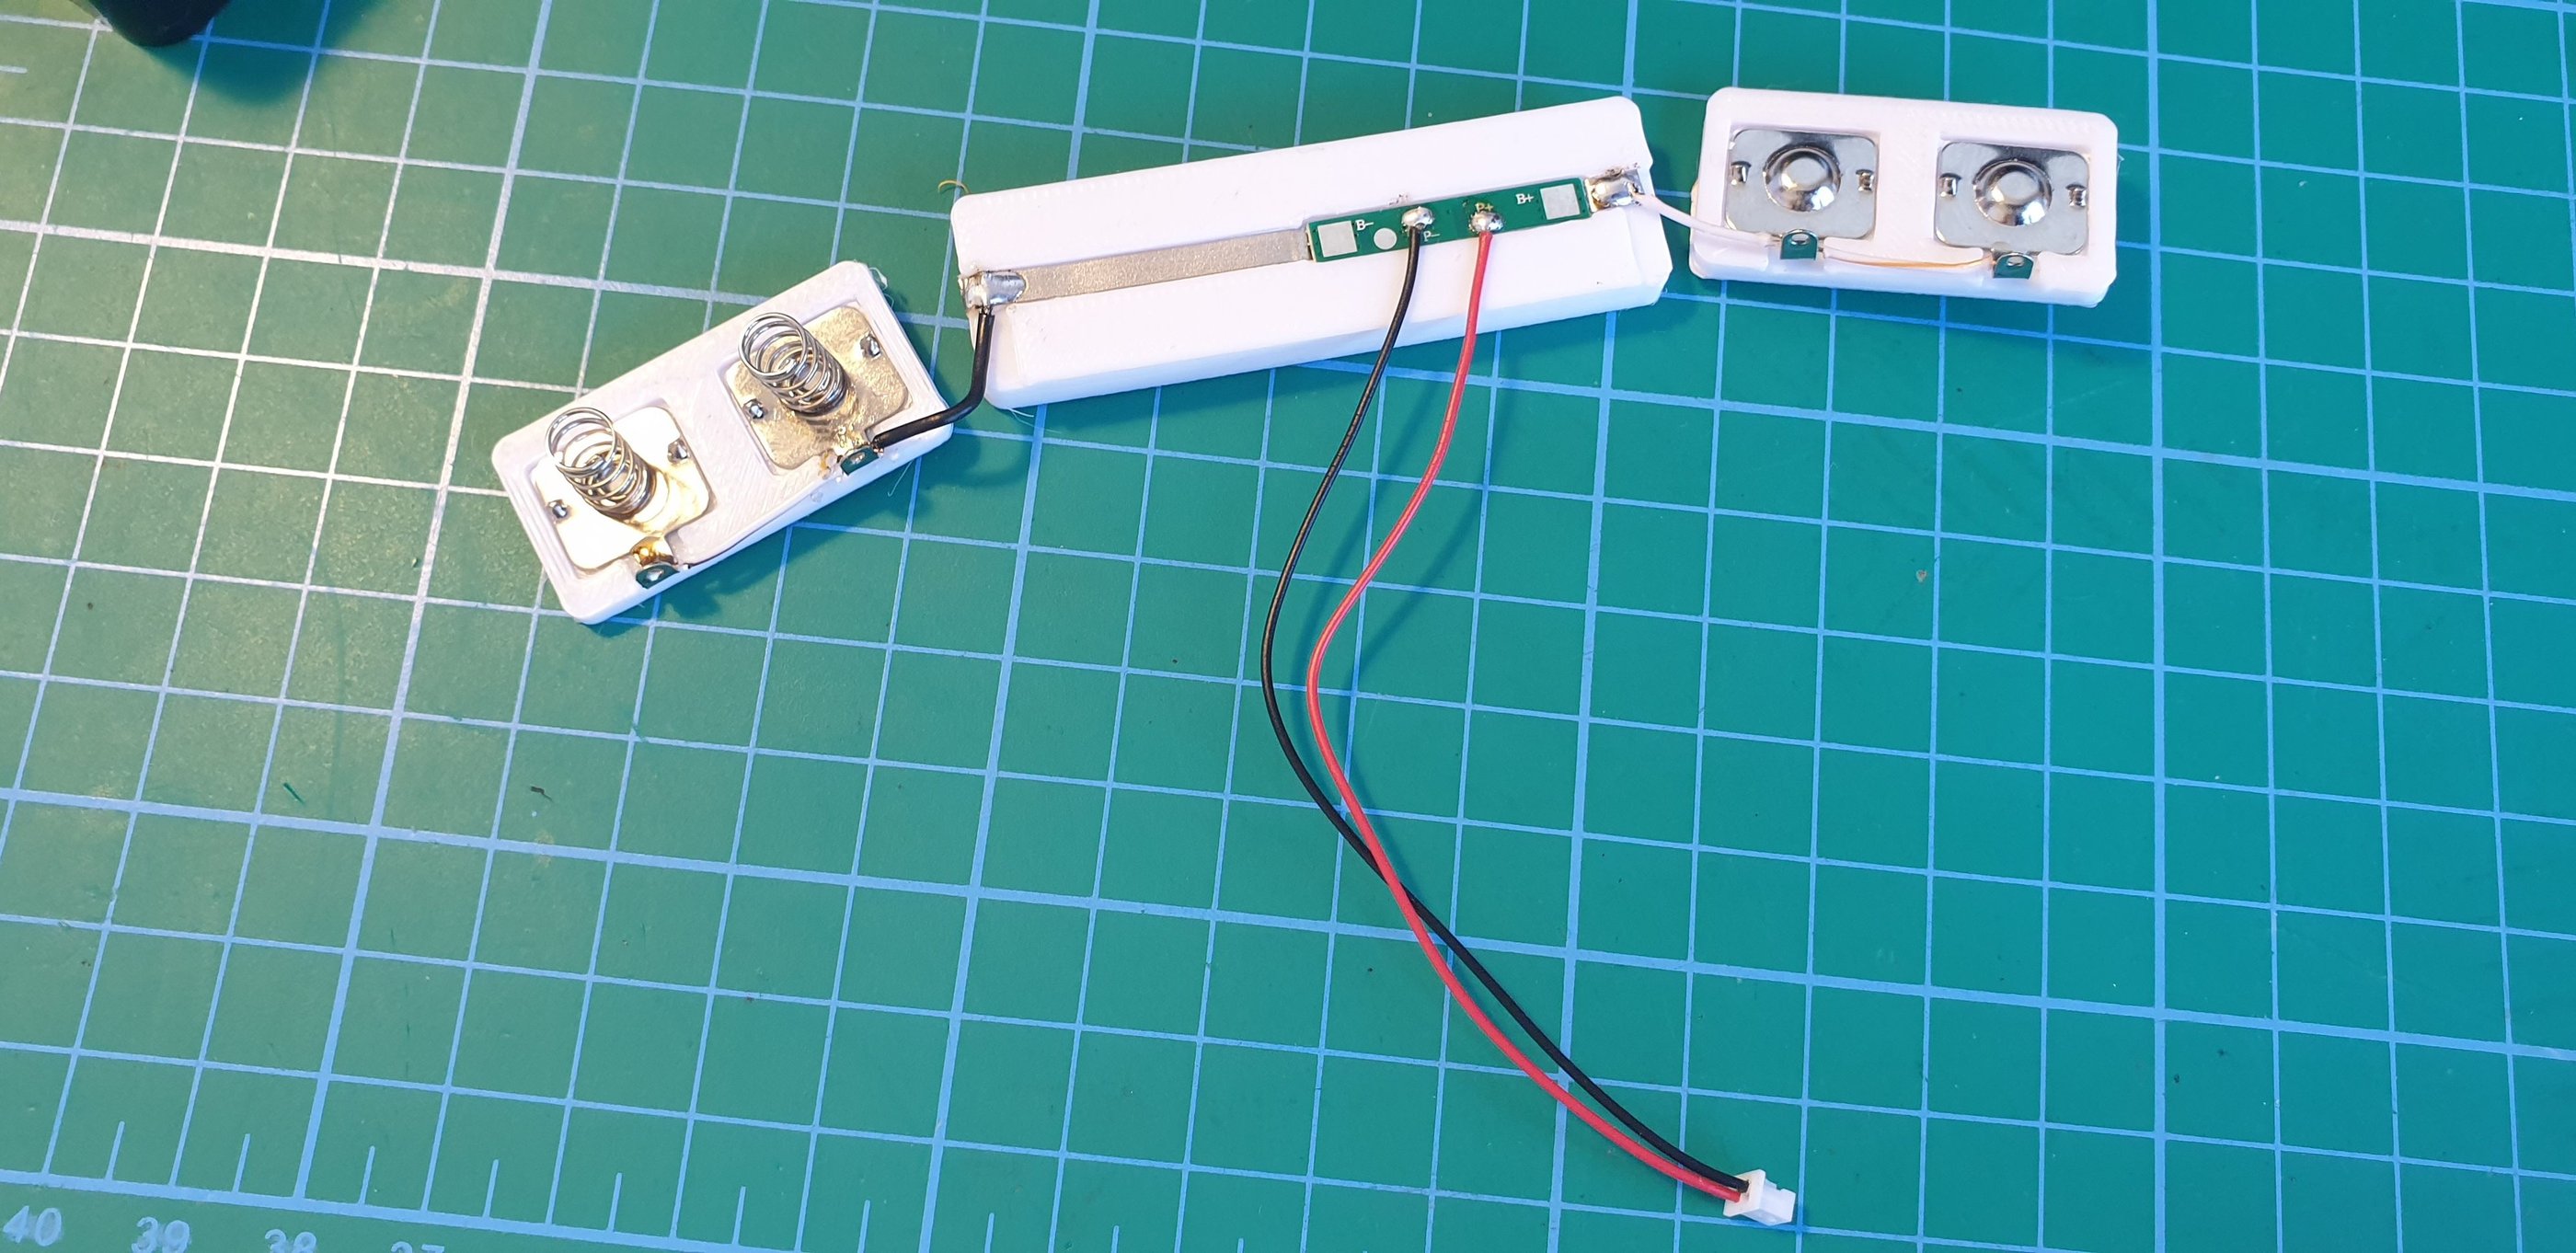
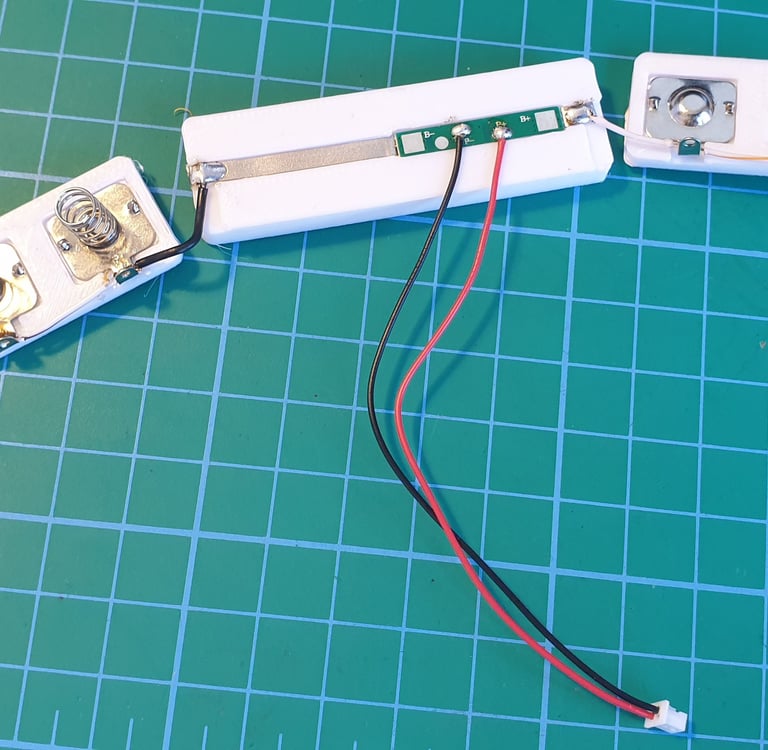
Solder short wires to connect the battery plates and the BMS, making sure to set up a parallel connection with the two 18650 cells.
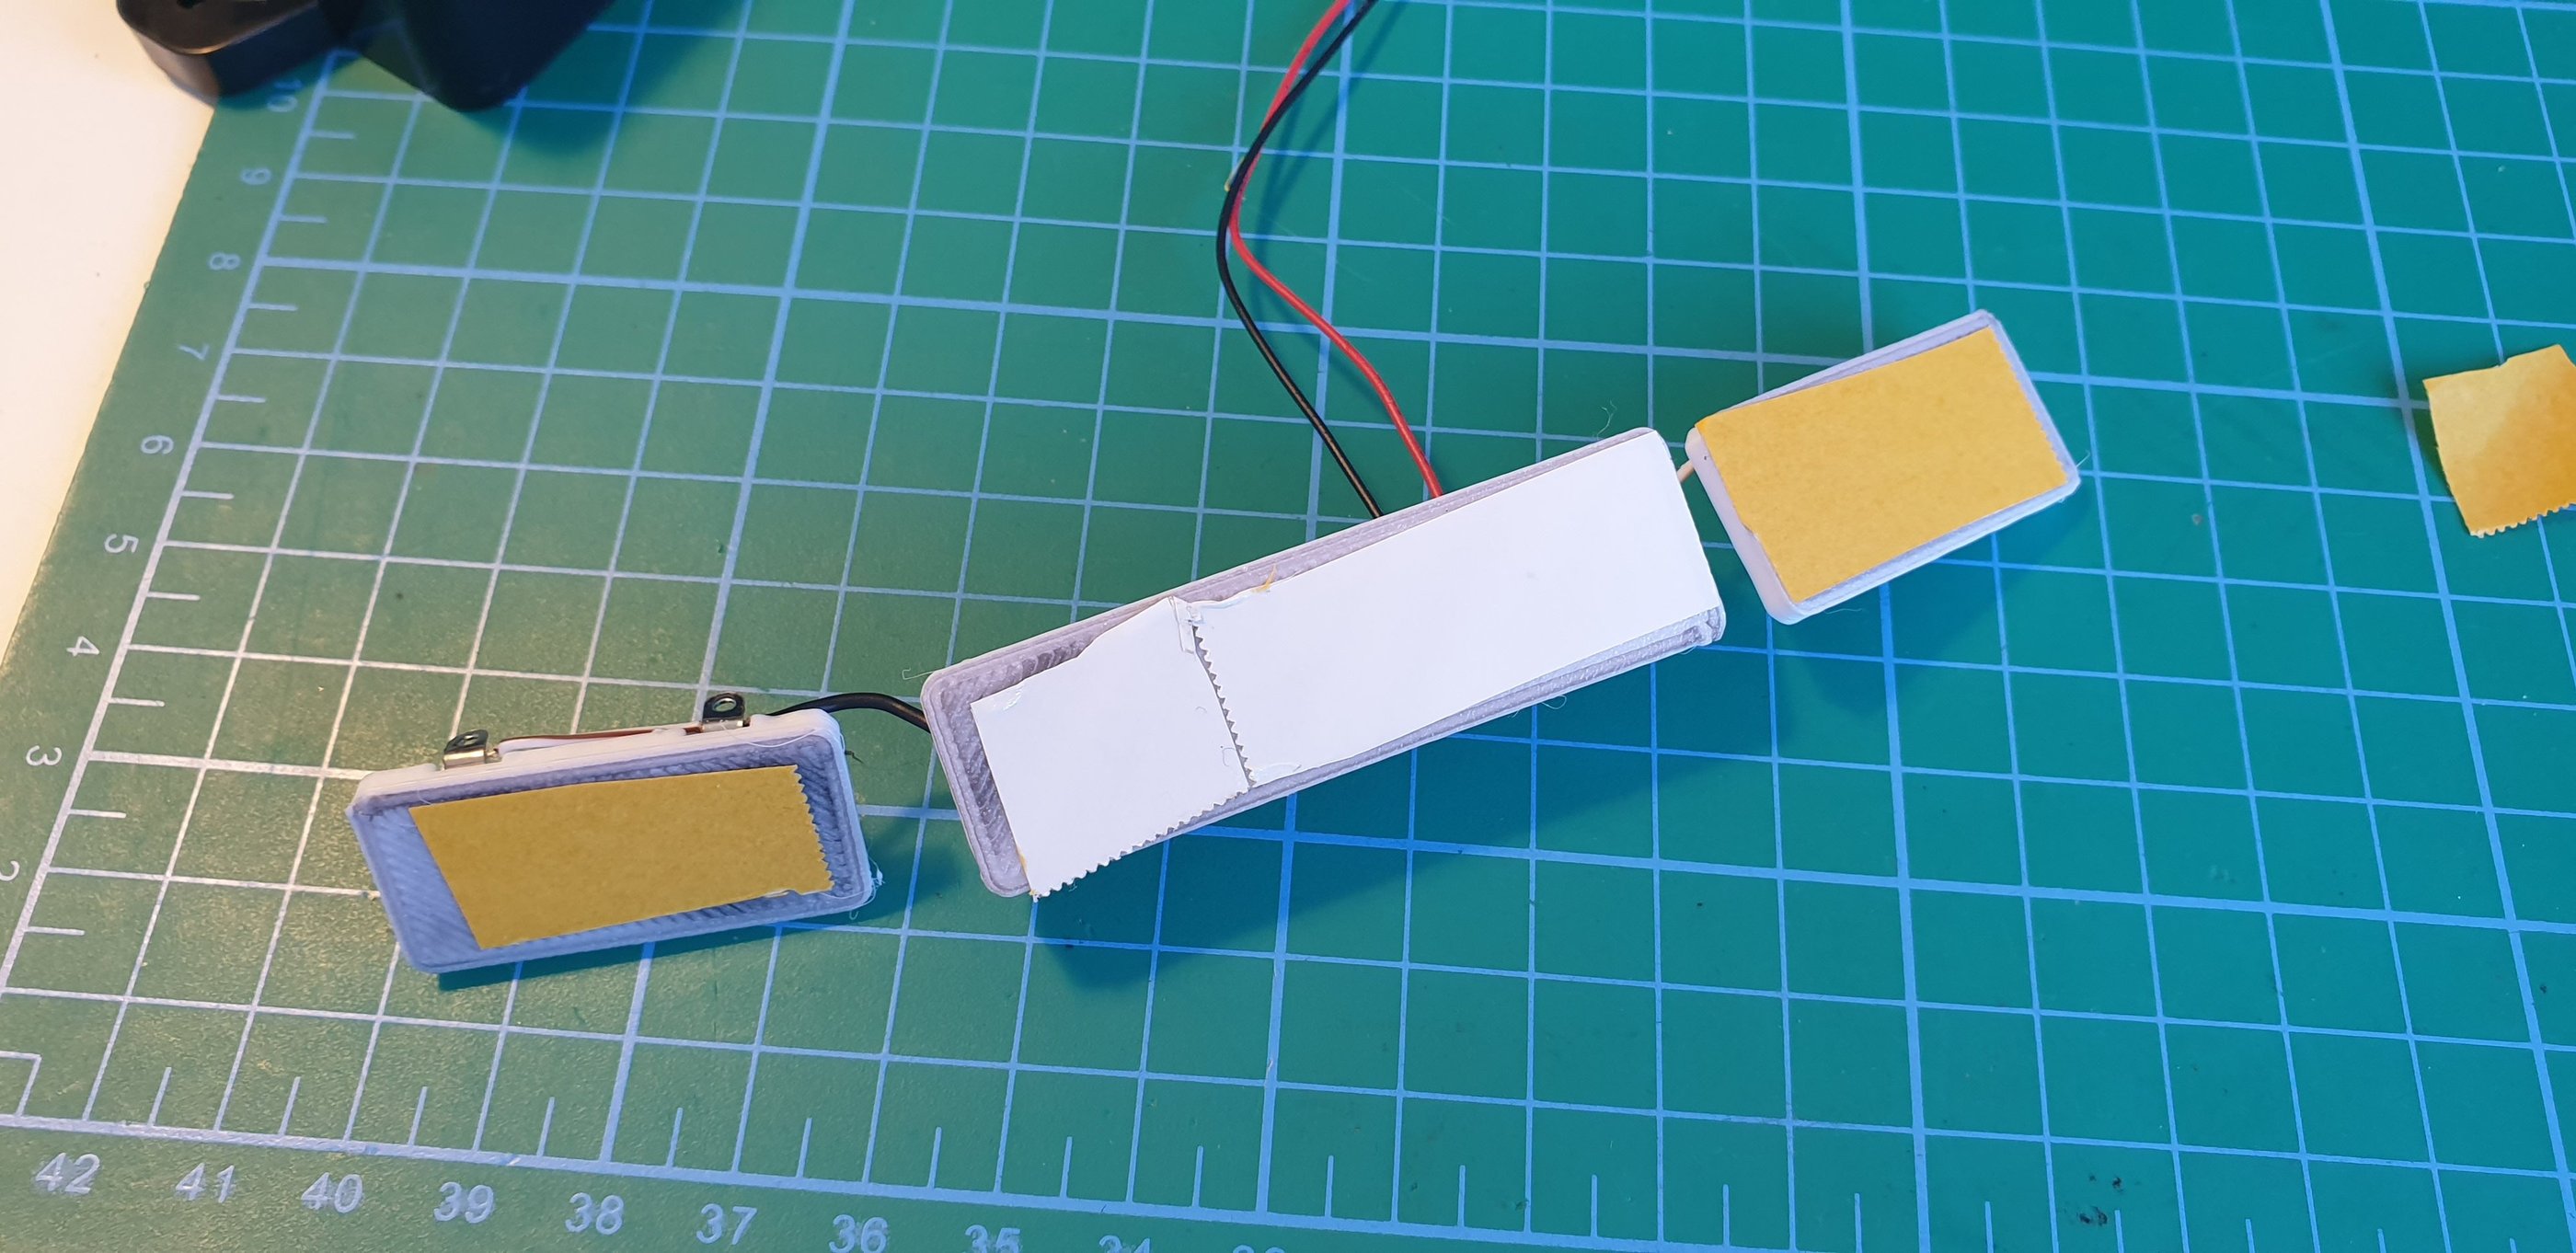
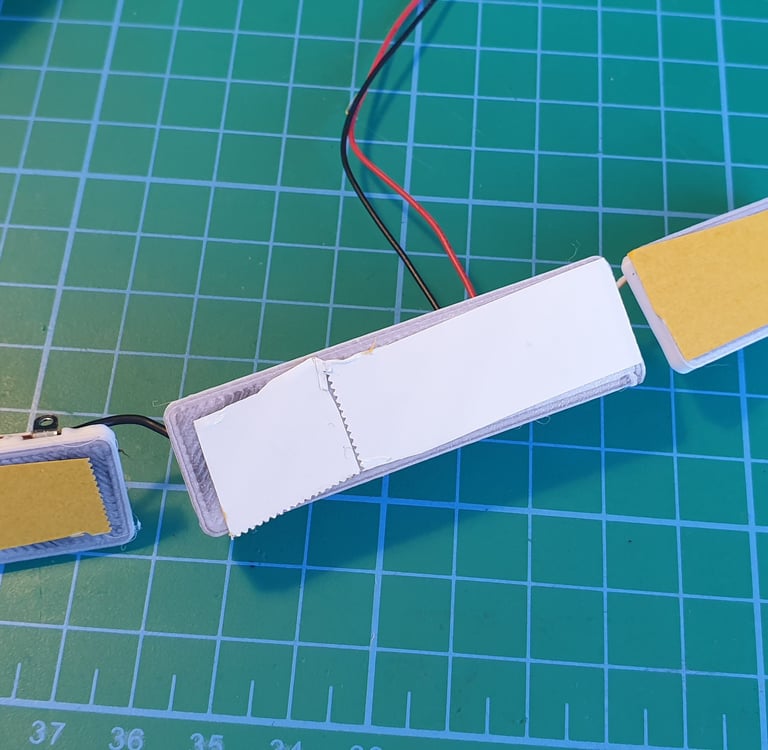
Once you’ve finished soldering, stick tape to the back of the components and place them in inside the case.
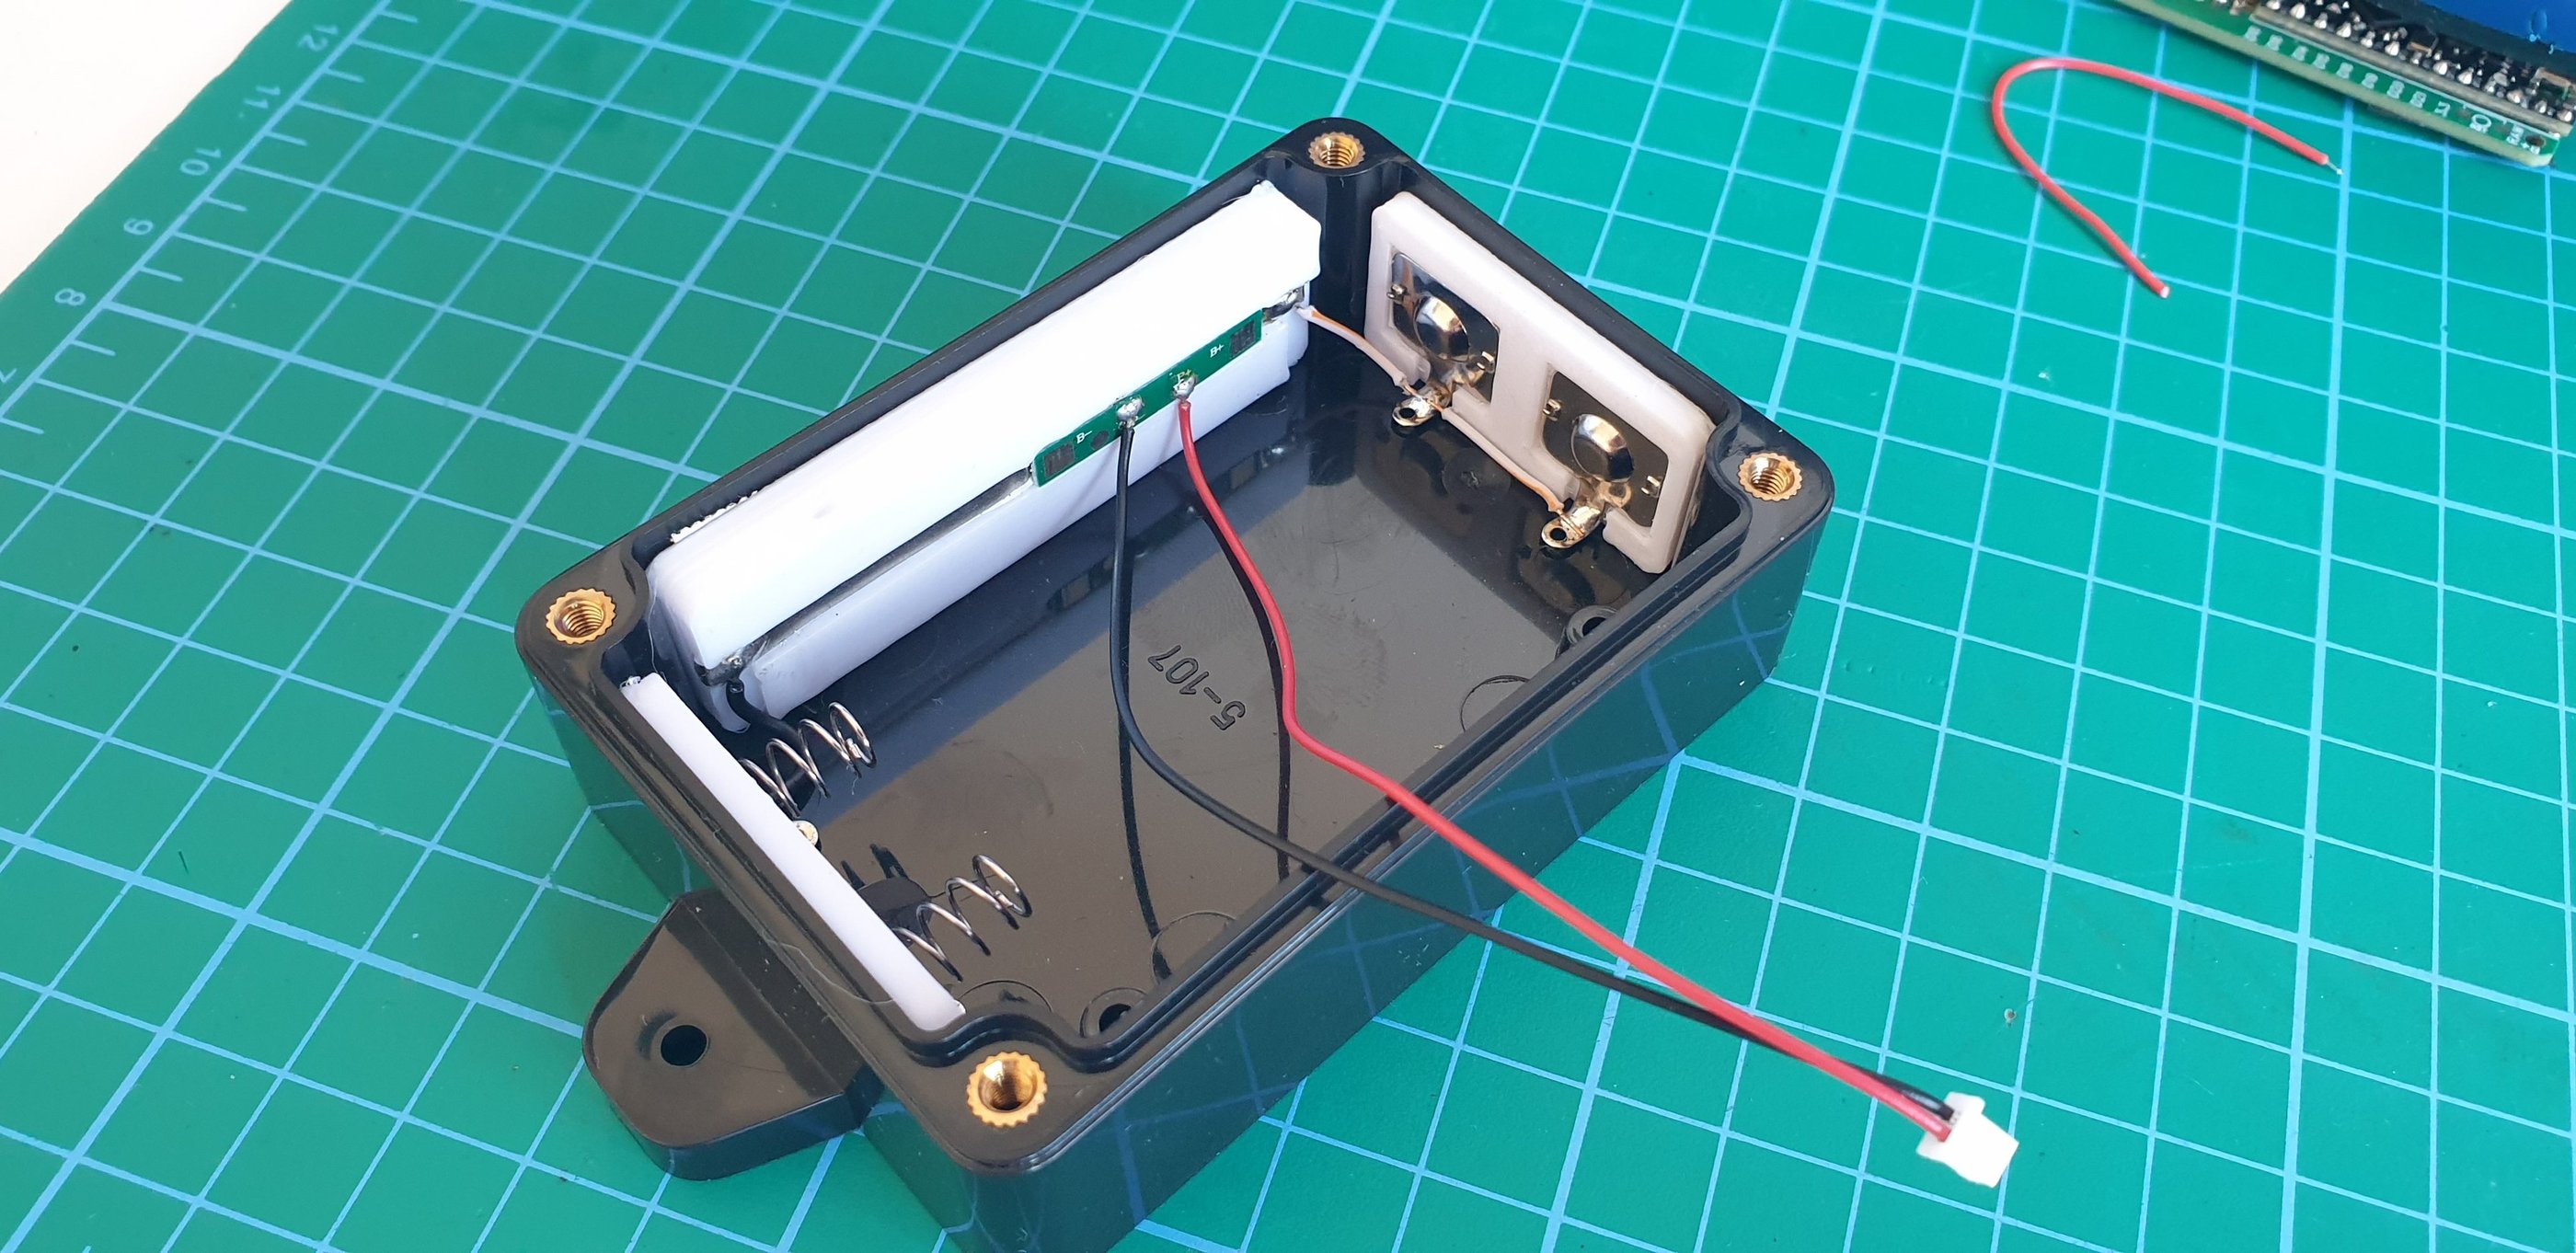
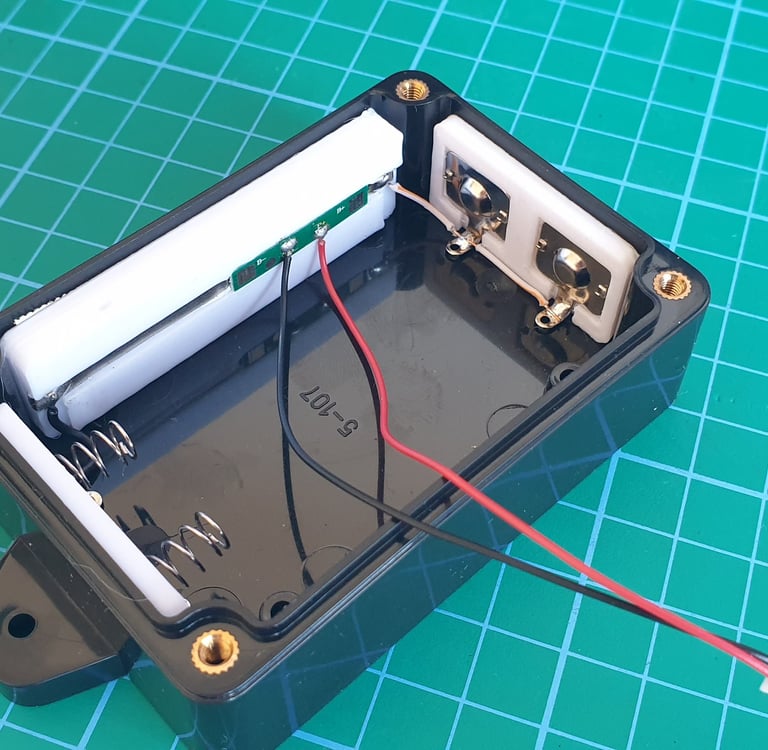
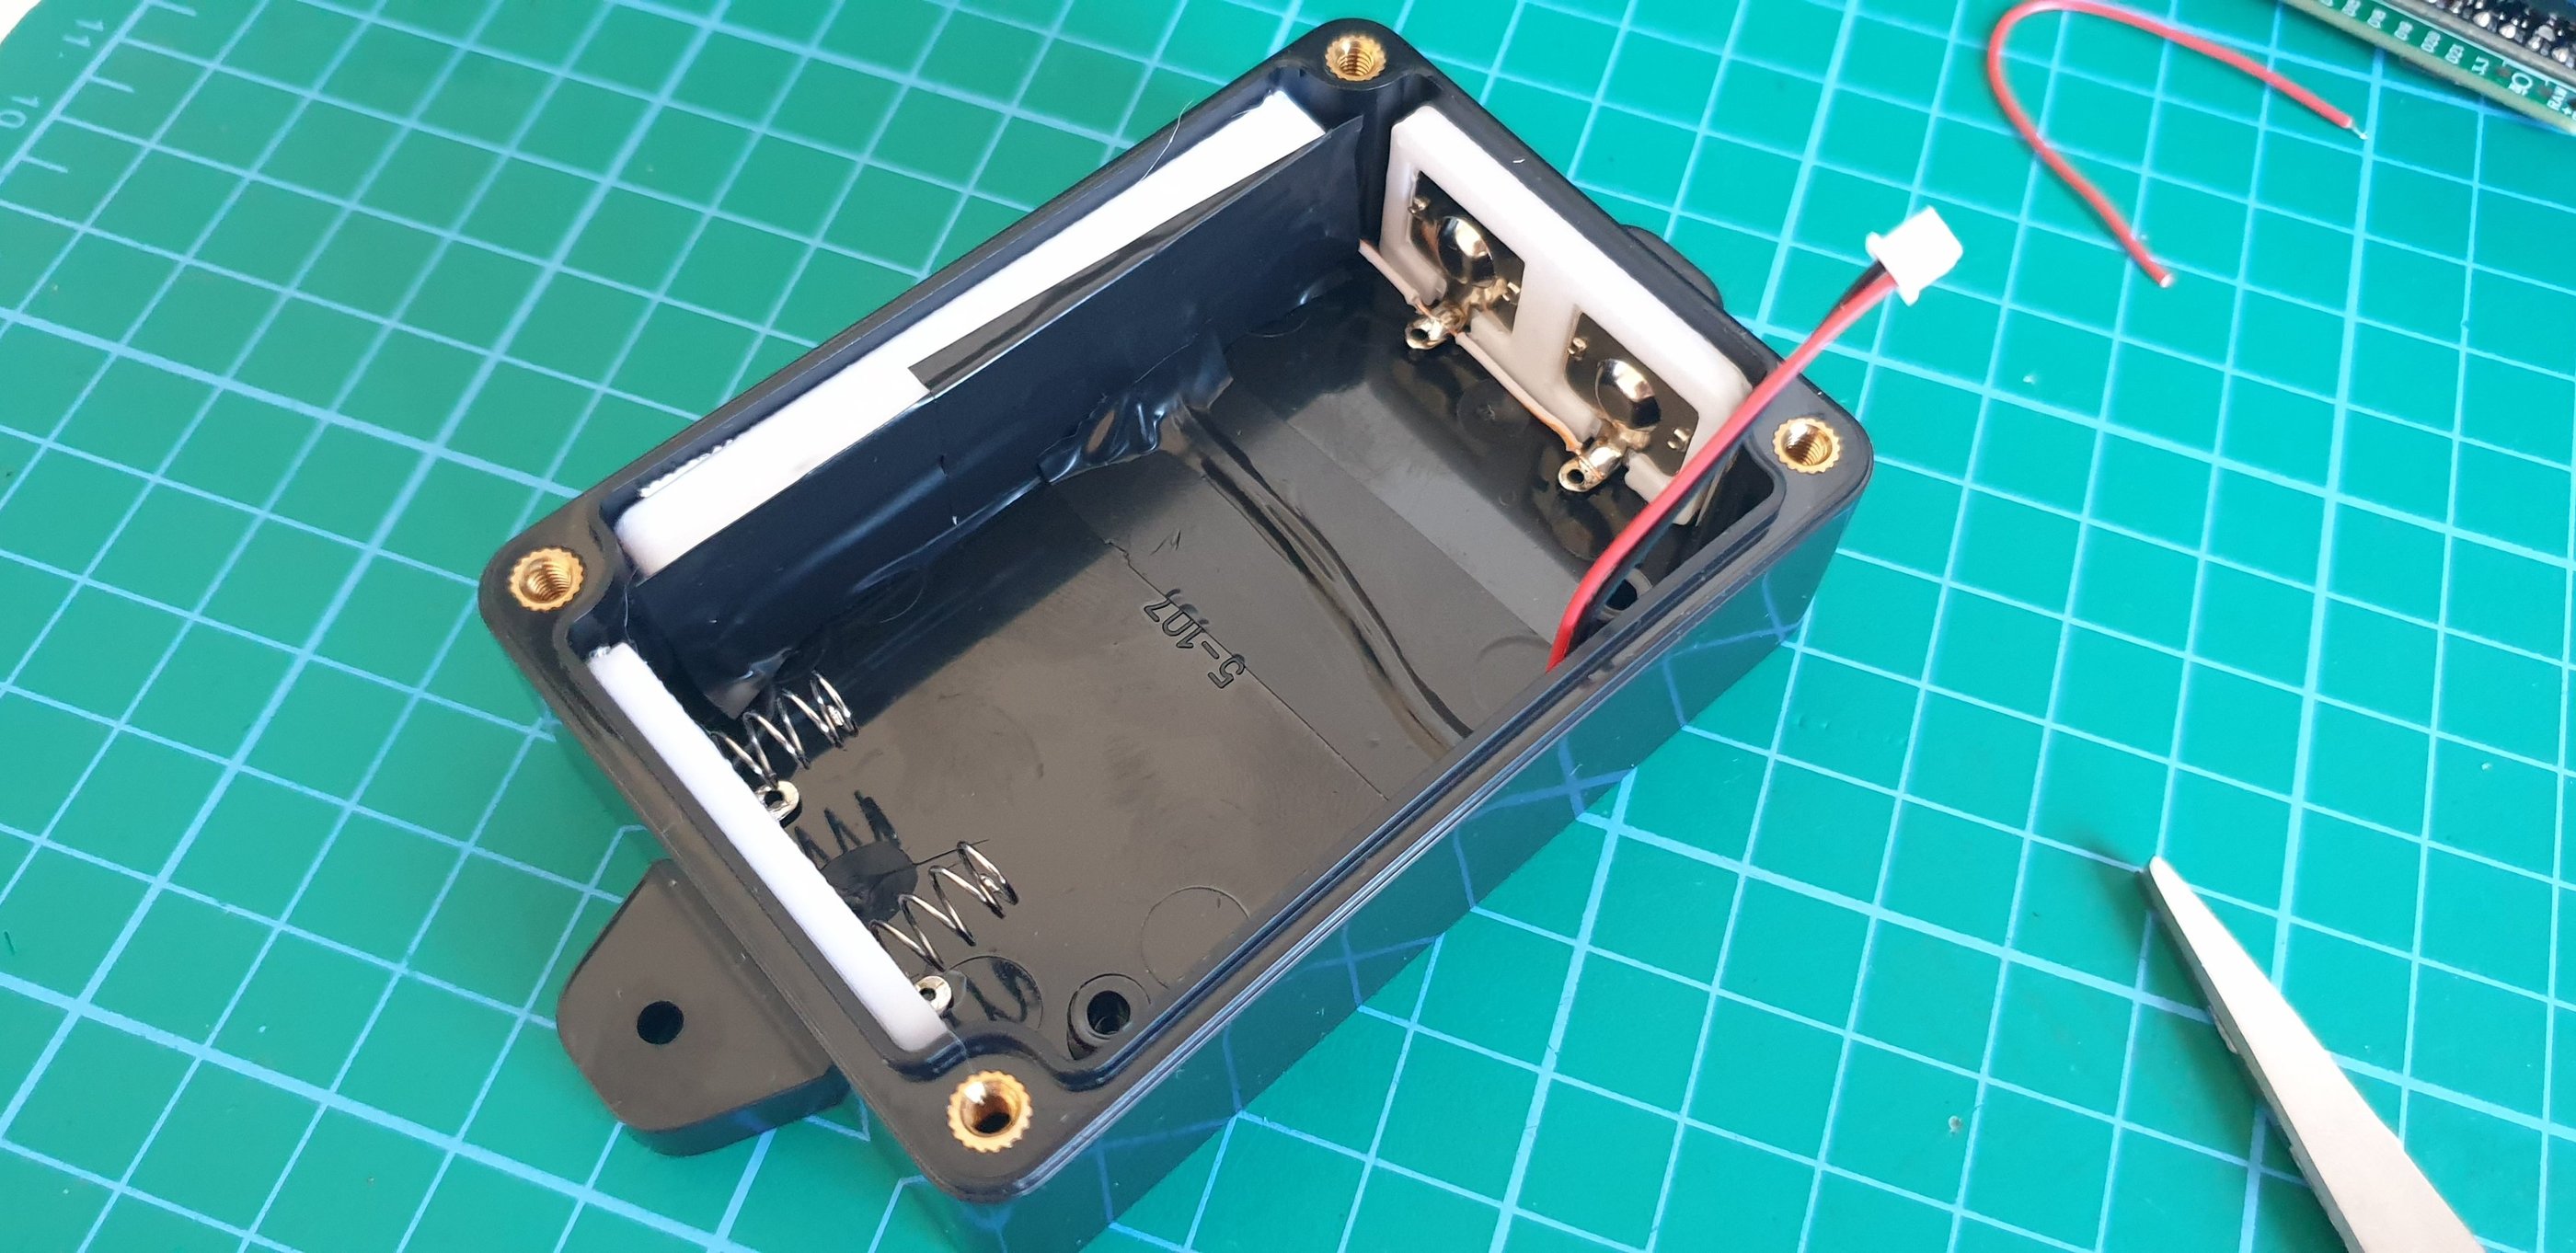
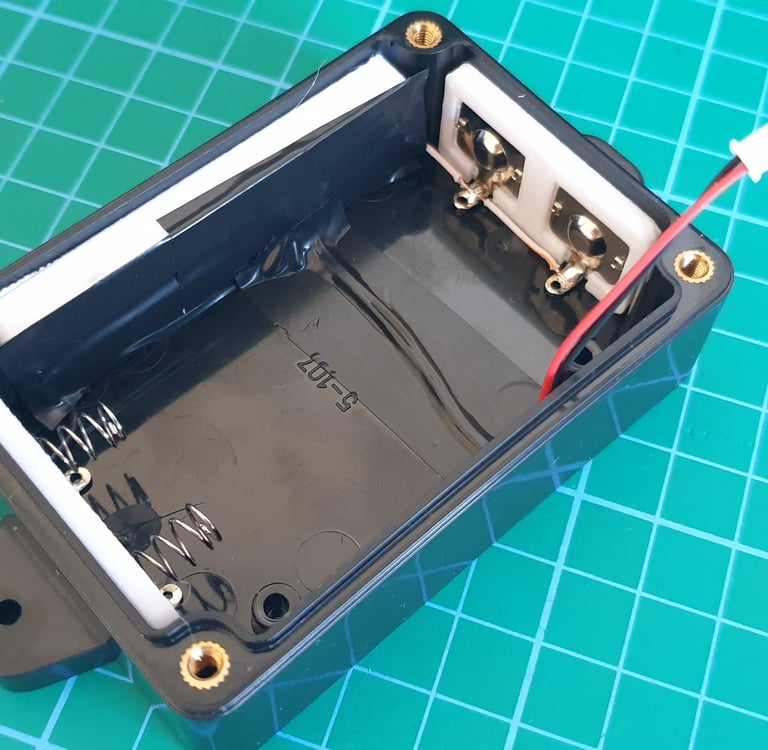
Insulate any exposed or loose wires with electrical tape. The bottom part with the power section is ready, let’s move on.
The lid is quite thin, and there’s limited space for the SMA connector, so it’s difficult to make a precise hole with a drill. I start by making a small 3 mm hole with a hand drill, then enlarge it to the required size using a round file.

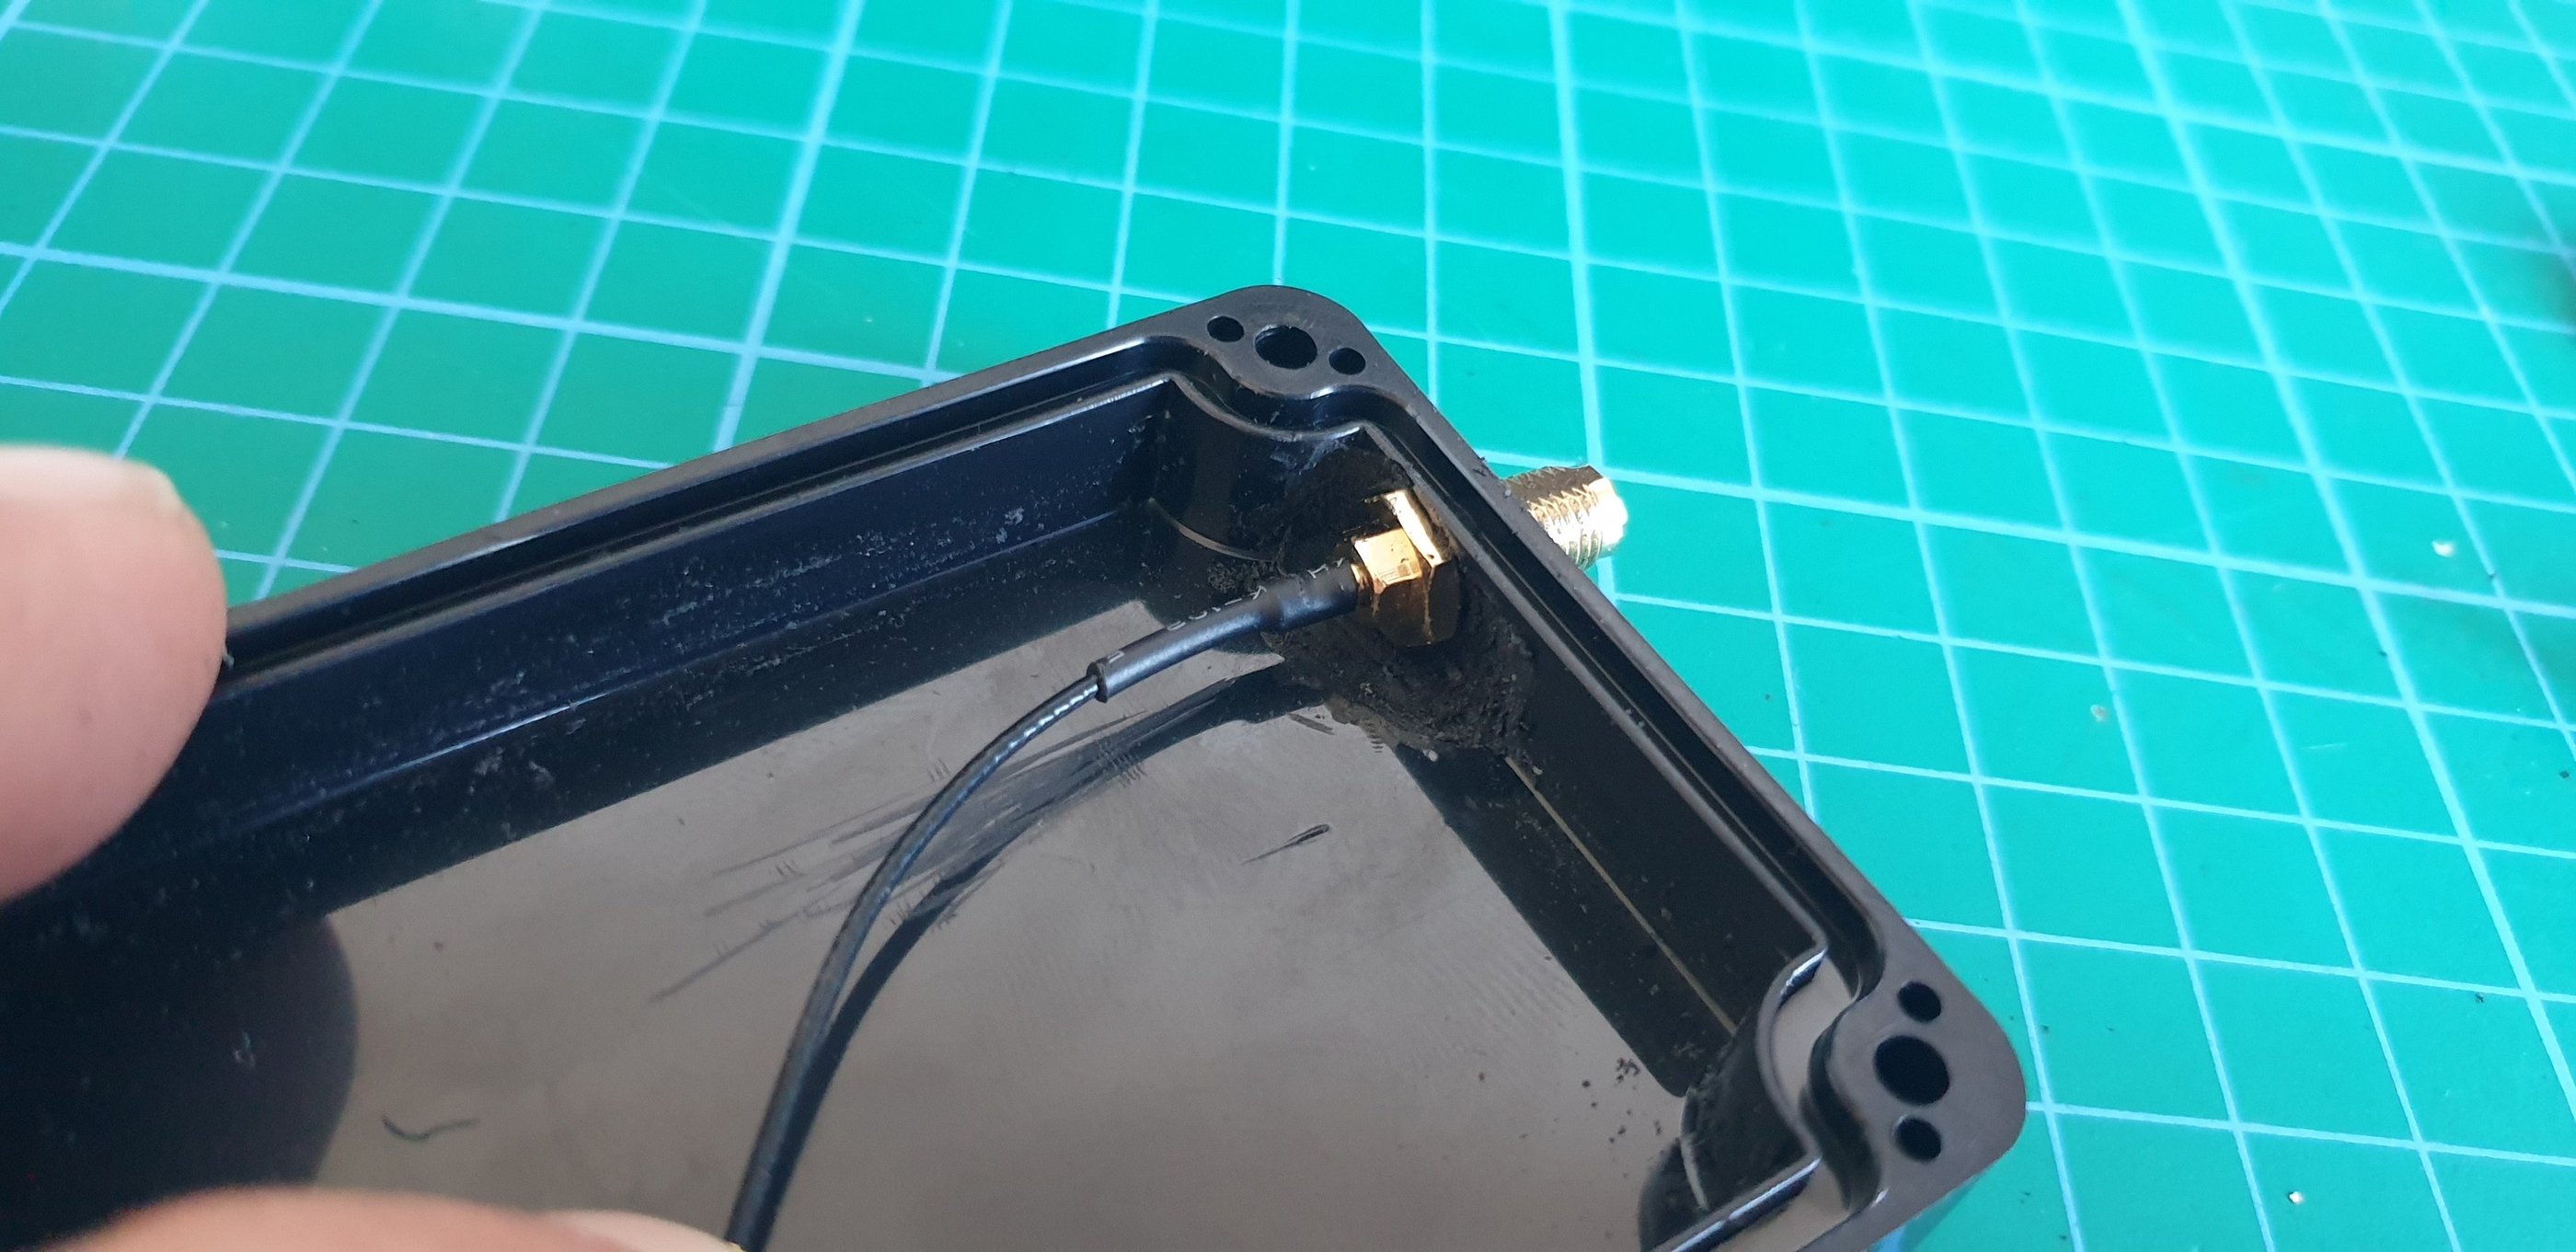
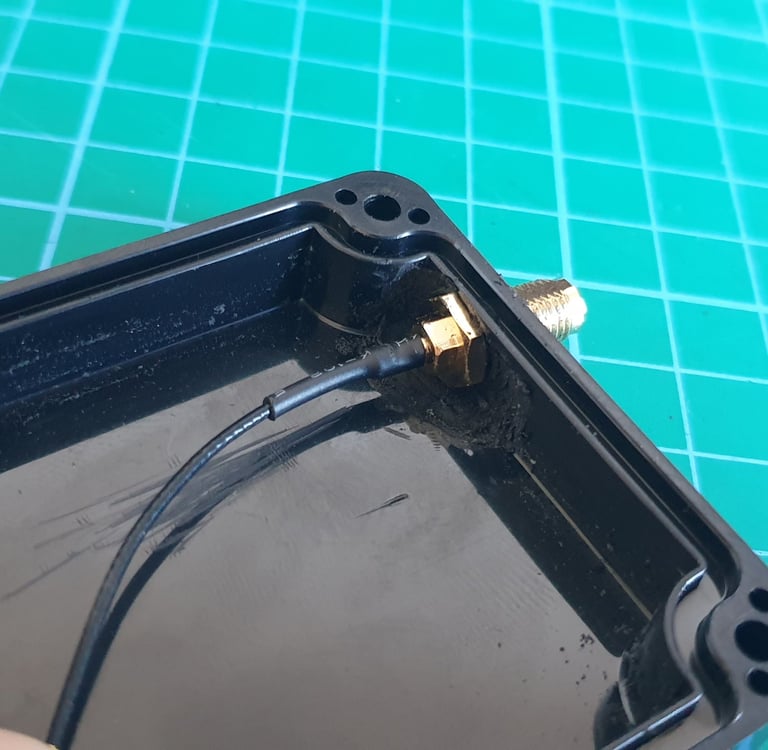
The second thing to check is the thickness of the box wall. A Dremel with a small cutting disc or a rotary milling bit will be helpful.
You need to thin it by about 1.5 mm so the SMA socket can be properly installed. If you don’t, the connector won’t have enough depth, and the antenna cannot be mounted correctly. Before powering up, make sure the SMA socket has sufficient length.
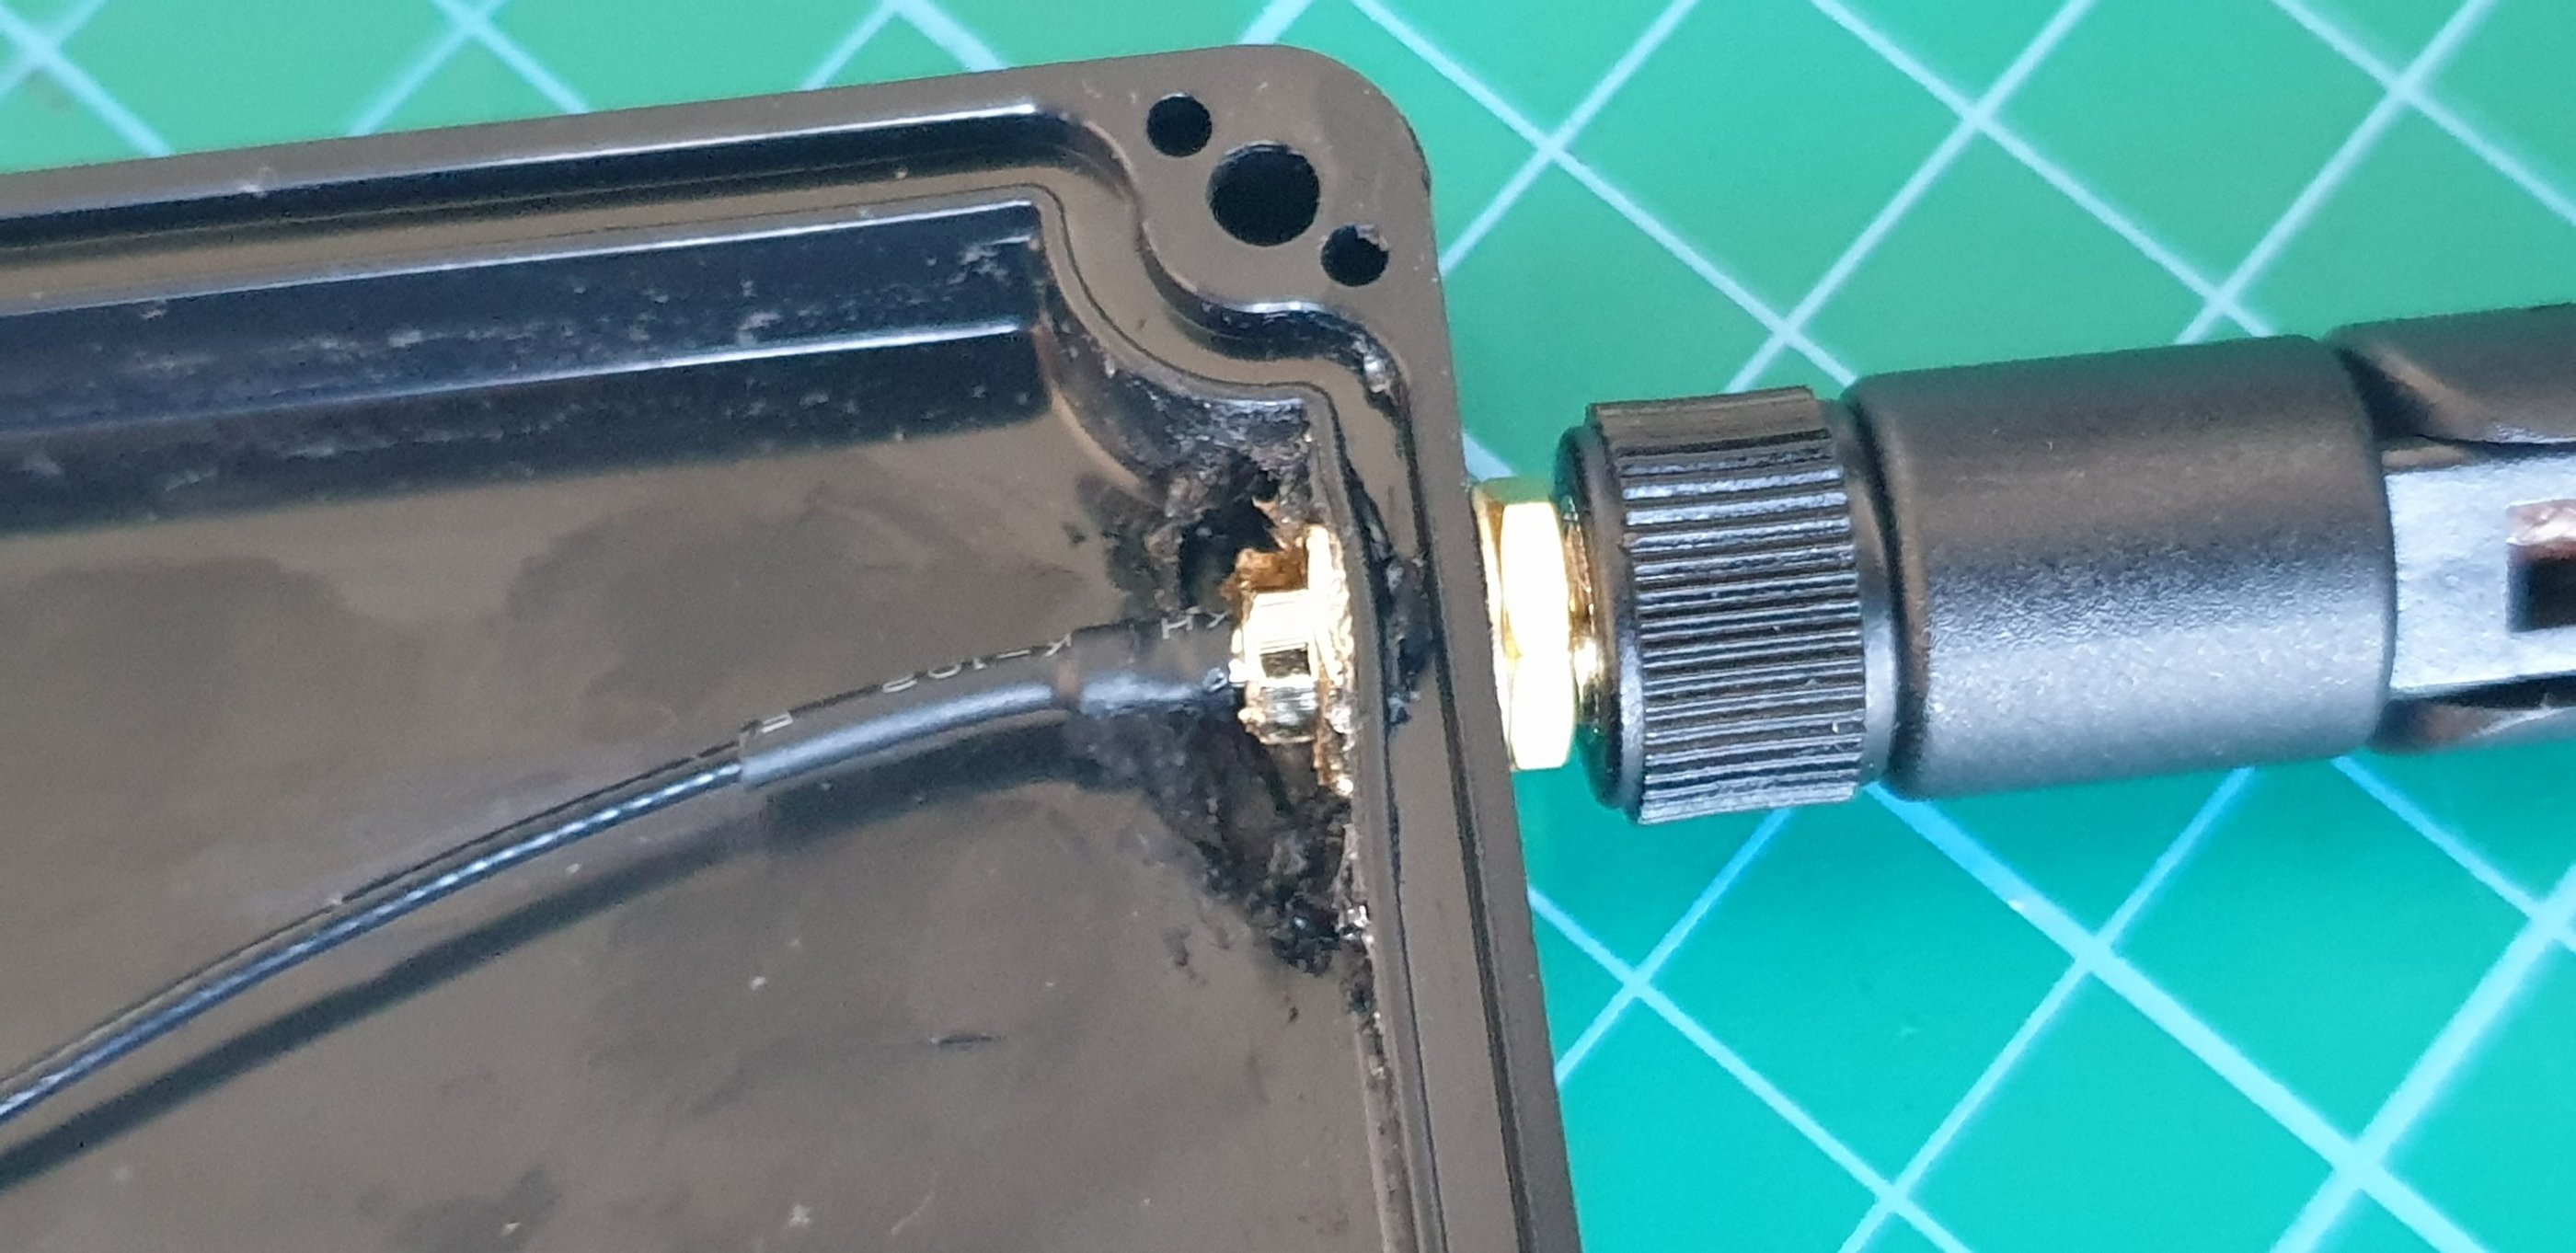
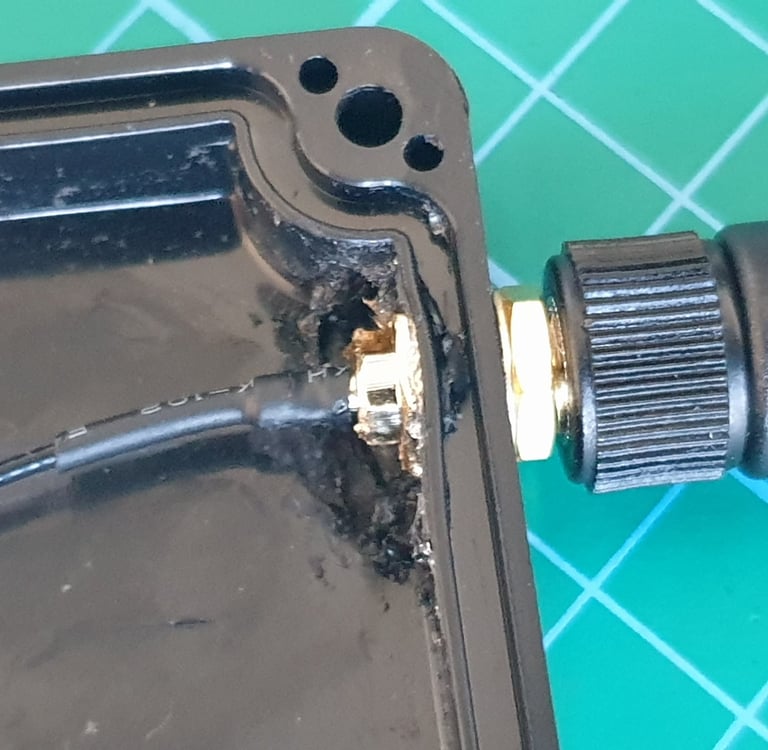
If the socket fits properly, screw it in and seal everything with silicone.
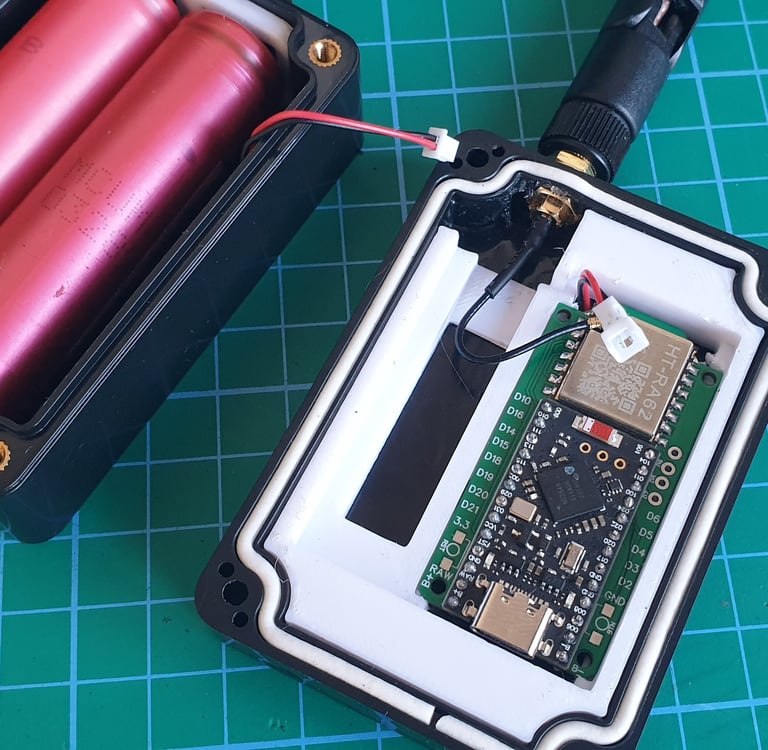
Now you can install the 3d printed PCB holder, connect the antenna, and start testing.
Testing
I assume that a Faketec board was tested for before installation.
In the case of the box, the most important thing is to check the polarity of the power wires. The next step is to make sure the SMA connector is properly sealed,and it is long enough, to connect corectly the antena.
If everything is OK, connect the antenna and power to the board, then log in to the repeater using the Meshcore app, or pair it with your phone via BT if you want to use the box as a companion radio.
If the tests were successful, you can arrange the wires, screw the cover.
Your box is now ready for operation.
Cost
The total cost should be under 20 EUR.
2-3 EUR box
10 EUR faketec
1 EUR 2x 18650
0.1 EUR JST pigtail
0.2 EUR battery conectors
2-5 EUR SMA pigtail + antena
0.2 EUR BMS
Advanced variants
I haven’t found any reason to add additional components to the mini box. After installing the basic parts, there is very little space inside. A weather sensor might possibly fit, but it doesn’t really make sense because the enclosure is sealed and the readings would not be accurate.
© 2025. All rights reserved.